
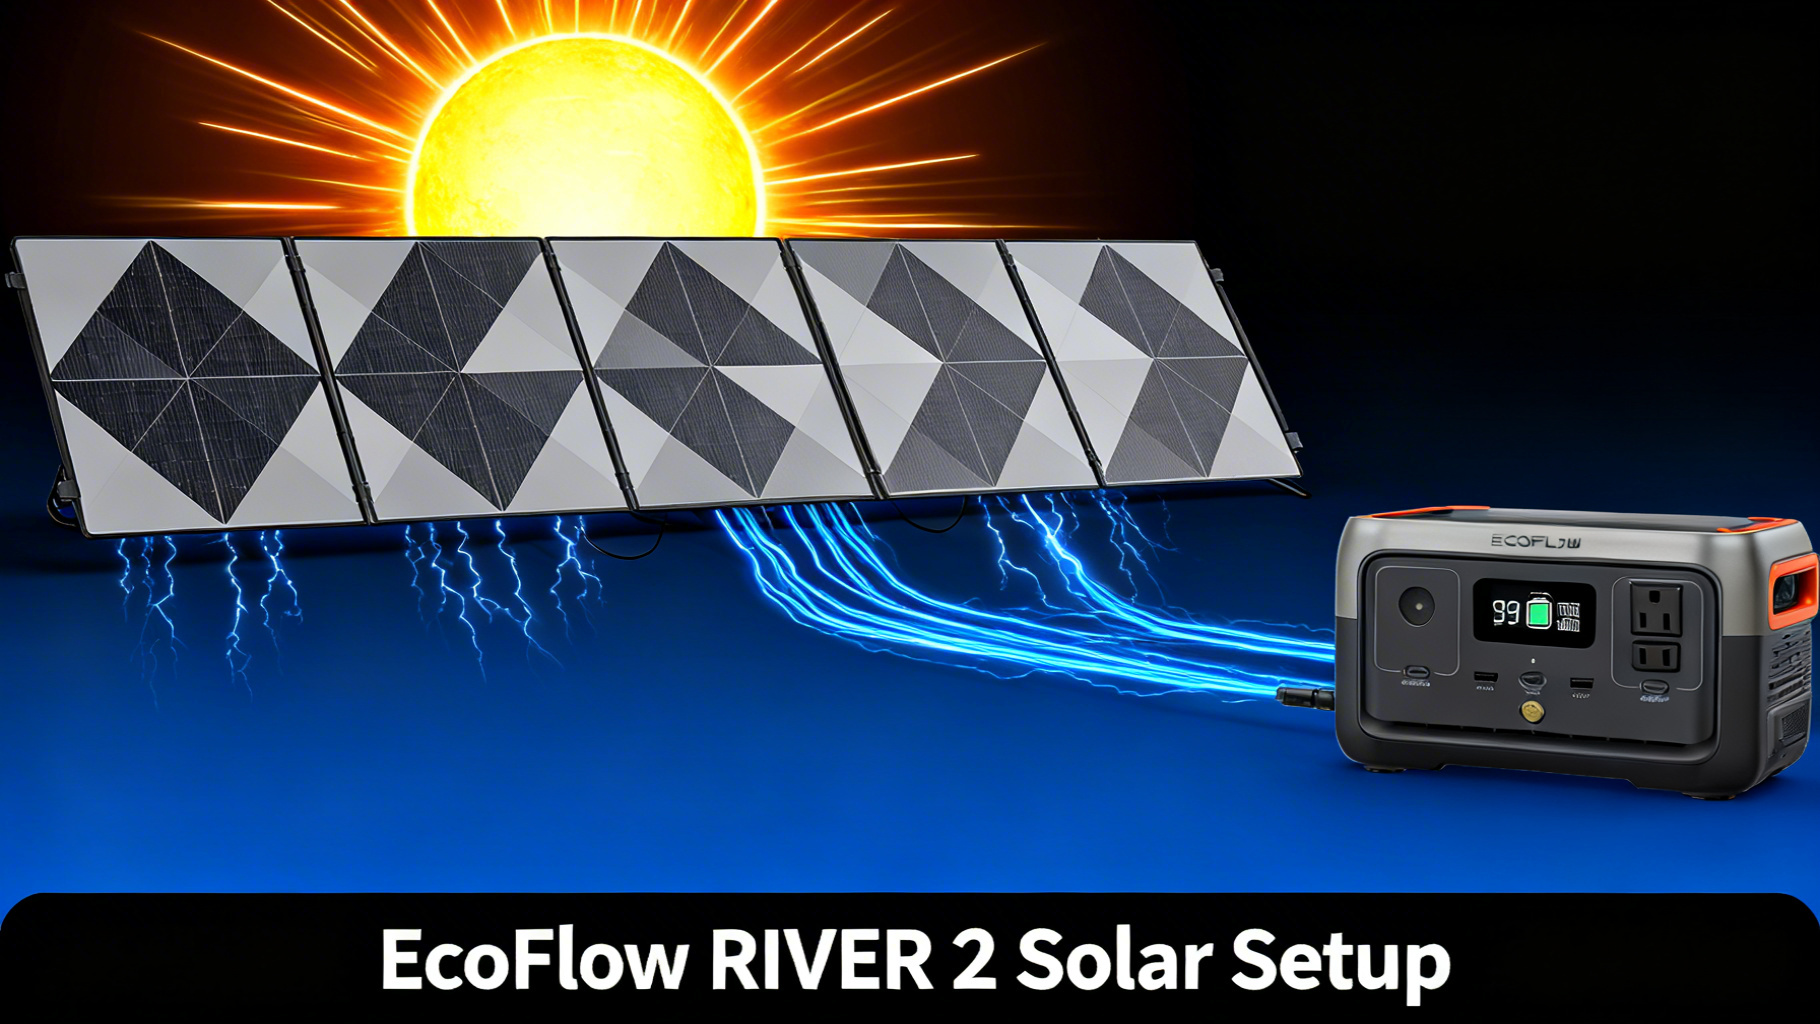
Not sure which solar panel works with the EcoFlow RIVER 2, or how to connect one without guessing? This guide walks you through the entire ecoflow river 2 solar setup: panel selection, connection steps, and real-world charge time data so you know exactly what to expect before you head out.
The RIVER 2 is a compact 300Wh LiFePO4 station priced at $189. It's purpose-built for camping, car travel, and light home backup. Before diving into panel selection, understanding the EcoFlow solar input specifications for the RIVER 2 makes the decision straightforward: a single number drives everything.

Before You Start: Key Specs That Drive Every Panel Decision
The RIVER 2 accepts up to 110W of solar input through a single XT60 port. That limit is enforced by the onboard MPPT controller (Maximum Power Point Tracking, the circuit that optimizes power conversion from your panel). Go above 110W and the controller simply throttles input down. Go below it and you're leaving charge speed on the table.
EcoFlow RIVER 2: Solar Charging Specs
Capacity
300Wh
Max Solar Input
110W
Solar Input Voltage
11-30V
Connector
XT60
Charge Time (110W)
~3h
Data: EcoFlow RIVER 2 official specifications. Charge time estimates under ideal solar conditions.
Understanding the 110W Solar Input Cap
Published specs confirm the RIVER 2 solar input ceiling is 110W at 11-30V DC. This matters for panel selection because it rules out any panel rated above 110W as a true upgrade: you pay more and get identical charge times. The 110W EcoFlow panel is specifically designed around this ceiling, which is why it's the natural pairing.

The XT60 Connector Explained
The XT60 is the yellow barrel connector on the RIVER 2's solar input port. It's a standardized high-current connector widely used in RC hobby electronics and, increasingly, in portable power. All EcoFlow panels ship with an XT60 cable. Third-party panels with MC4 connectors (the T-shaped ones common in rooftop solar) need a separate MC4-to-XT60 adapter to connect to the RIVER 2.
⚠️ Common mistake: Buying a third-party panel with MC4 output and assuming it will plug directly into the RIVER 2. It won't without an adapter. EcoFlow's own panels are plug-and-play: XT60 out of the box, no adapter required.
What You'll Need (Materials & Equipment)
The setup is minimal. You need the station, a compatible panel, and the cable that ships with the panel. Here's a quick reference before you buy:
EcoFlow RIVER 2 Portable Power Station
$189.00 $239.00
- 300Wh LFP battery (10-year lifespan)
- 0-100% charge in 60 minutes
- 110W max solar input, XT60 port
Choosing the Right Solar Panel for Your RIVER 2
There are three EcoFlow panels worth considering for this setup. The 110W is the obvious match. The 60W makes sense for ultralight travel. The 160W is worth understanding because it comes up frequently, but the data tells a clear story about whether it's worth it here.
The 160W panel is worth addressing directly: yes, it connects. No, it won't charge the RIVER 2 faster than the 110W panel. The RIVER 2's MPPT controller caps input at 110W regardless of panel rating. The EcoFlow 110W panel product page confirms it hits that ceiling exactly. If you're eyeing the RIVER 2 Max solar setup at some point, that's where the 160W panel finally earns its keep: the Max accepts up to 160W of solar input, which meaningfully cuts charge times on the larger 512Wh battery.


Step-by-Step Solar Setup: 5 Steps to Your First Solar Charge
The process takes under 10 minutes once you've done it once. No tools required. Here's how to go from unboxed to charging.
Step 1: Inspect the Equipment Before You Connect
Before connecting anything, take 60 seconds to verify the XT60 connector on your panel cable. The pins should be clean, undamaged, and free of debris. Check the RIVER 2's solar input port (labeled “DC Input” on the panel) for the same. A loose or dirty connection is the most common reason for a zero-watt reading on first setup.

Also confirm the panel surface is clean. Dust, fingerprints, or bird droppings on the cells will reduce output measurably, and on a 60W panel you'll feel every watt lost. A quick wipe with a dry cloth is enough.
You'll know you're ready when: both connectors look clean and the XT60 pins on the cable are aligned with the port.
Step 2: Position the Solar Panel for Maximum Output
Angle matters more than most people expect. A panel lying flat on the ground in full sun might deliver 60-70% of its rated output. Tilted to face the sun directly, the same panel can approach 90-100% of rated wattage. The 110W EcoFlow panel has a built-in kickstand: deploy it and angle the panel to face the sun as directly as possible.

For most US locations, starting at a 45-degree south-facing tilt is a solid baseline. In the morning, rotate slightly east. In the afternoon, rotate slightly west. For a deep-dive on maximizing output throughout the day, the solar panel angle optimization guide covers tilt, orientation, and seasonal adjustments in detail.
💡 Pro Tip: Keep the RIVER 2 itself in the shade during solar charging. The station's thermal management system can throttle charging if the unit overheats in direct sunlight. A solar extension cable (~$30) lets you run the panel in sun while the station sits in shade.
Step 3: Connect the Panel to the RIVER 2
Insert the XT60 connector from the solar cable into the RIVER 2's DC input port. Push firmly until you feel or hear a click. The connector is keyed, so it only inserts one way. Don't force it if it's resisting; check alignment first.
Turn on the RIVER 2 if it isn't already on. Within a few seconds, the LCD screen will display the solar input wattage as an incoming arrow. A reading of any wattage confirms the connection is good. Zero wattage means either the panel is shaded, the connector isn't fully seated, or the panel's voltage is outside the 11-30V window.
You'll know it's correct when: the display shows a positive solar input reading, even 10-20W on a partly cloudy day confirms the circuit is live.
Step 4: Monitor the Solar Input Reading
Watch the display for 2-3 minutes after connecting. With the 110W panel in direct sun, charge input data consistently shows 80-110W in optimal conditions. MPPT efficiency and ambient temperature account for the gap between 110W rated and the 80-95W you'll typically see in the real world. That's normal and expected.
A reading of 20-40W when you expect 80-110W usually points to one of two things: the panel angle needs adjustment, or there's partial shading from a cloud, tree branch, or roof overhang. Even a small shadow across a corner of the panel can drop output significantly. The ecoflow river 2 solar charging screen updates in real time, so you can adjust and see the result immediately.
Calculate Your Exact Runtime
Running numbers on your specific devices is straightforward with the runtime calculator: enter the RIVER 2's 300Wh capacity and your appliance wattage for exact estimates.
Step 5: Optimize and Adjust Throughout the Day
The sun moves roughly 15 degrees per hour. A panel perfectly aimed at 9 AM is pointing 45 degrees off by noon. Charge input data shows that re-angling every 2-3 hours adds meaningful watt-hours to your total daily harvest, especially on a compact station like the RIVER 2 where maximizing each solar session matters.
You don't need to track the sun obsessively. One or two repositions during a full day of solar charging is enough to recover most of the potential output you'd otherwise lose to drift. Check the display reading before and after any adjustment: if it goes up, you're pointing in the right direction.
What Can You Charge After a Full Solar Top-Up?
A full 300Wh solar charge on the RIVER 2 goes further than most people expect for everyday camping needs. Runtime calculations based on 300Wh capacity at 85% inverter efficiency show the following estimates:
What Can a 300Wh RIVER 2 Power After a Full Solar Charge?
📱
Smartphone
20+ charges
15W avg
💻
Laptop
4–5 charges
60W avg
💡
LED Camp Light
30+ hrs
10W avg
⛺
Mini Projector
~6 hrs
50W avg
Runtime calculations based on 300Wh capacity at 85% inverter efficiency. Actual results vary by device draw and ambient conditions.
Where 300Wh shows its limits: a mini-fridge drawing 40-60W continuously will drain the RIVER 2 in 4-6 hours. For overnight fridge power, you'd need to pair the station with continued solar input during the day to keep up. That's a common pattern for campsite use: run the fridge from the station while the panel tops it up through daylight hours.

Solar Charging Troubleshooting: 5 Common Issues
Most solar charging problems with the RIVER 2 come down to one of five scenarios. Here's a direct reference for each:
Pro Tips: Getting the Most from Your RIVER 2 Solar Setup
A few habits make a measurable difference in daily solar harvest, especially if you're relying on the RIVER 2 as your primary power source during a multi-day trip.
Tip 1: Keep the Station in the Shade
The RIVER 2's LiFePO4 (lithium ferro-phosphate) chemistry handles heat better than standard lithium-ion, but sustained high temperatures still reduce charge efficiency and can trigger thermal protection. Position the station under a tarp, in the car, or under a camp table while the panel does its work in the sun. The extension cable makes this straightforward.
Tip 2: Avoid Stacking Multiple Panels Beyond 110W
The ecoflow river 2 solar connector accepts a single XT60 input. Connecting two panels in parallel to push past 110W won't speed up charging and can create voltage irregularities that confuse the MPPT controller. The 110W ceiling is firm. One well-aimed 110W panel in good sun is your optimal setup.
Tip 3: Chain Solar and AC Simultaneously
The RIVER 2 supports simultaneous solar and AC charging. On cloudy days when solar input drops to 20-40W, plugging into shore power (if available) tops up the gap. The station manages both inputs without any configuration needed. Useful at a campsite with electrical hookups when the sky isn't cooperating.
Comparing the Full RIVER Series
Still deciding between models? The RIVER series lineup and capacity differences guide breaks down when the step-up to RIVER 2 Max or Pro makes sense.
When to Upgrade to the RIVER 2 Max
The RIVER 2 is purpose-built for light to moderate use: weekend camping, car trips, day hikes with power needs, and single-night home backup. Its 300Wh capacity and 110W solar ceiling fit those use cases well.
The picture changes if you need more than one or two nights of independent power, plan to run a full-size electric cooler, or want to charge the station faster. The RIVER 2 Max steps up to 512Wh and a 160W solar input ceiling, which cuts solar charge time meaningfully on a larger battery. For readers who want the extended capacity, the RIVER 2 Max solar setup covers that configuration in detail.
The honest answer: if your power needs are covered by 300Wh per day and you're not running high-draw appliances, the RIVER 2 with the 110W panel is a capable, compact solar kit at a lower cost of entry ($189 + $169 = $358 all-in).
Frequently Asked Questions
What solar panel is compatible with the EcoFlow RIVER 2?
Any panel with an XT60 output connector rated between 11-30V and up to 110W is compatible. EcoFlow's own 60W and 110W portable panels connect natively without adapters. Third-party panels with MC4 connectors require a separate MC4-to-XT60 adapter.
Can I use a 160W panel with the EcoFlow RIVER 2?
Yes, but the RIVER 2's MPPT controller limits solar input to 110W. The 160W panel charges at the same speed as the 110W panel. The 160W makes more sense with the RIVER 2 Max, which accepts up to 160W of solar input and has a 512Wh battery that can actually benefit from the higher wattage.
How long does it take to charge the RIVER 2 with solar?
With the 110W panel under direct sunlight, charge time data confirms approximately 3 hours from 0 to 100%. Partial shade or a 60W panel extends that to 5-6 hours. Real-world conditions (clouds, angle, temperature) typically add 20-30% to ideal estimates.
Can I use non-EcoFlow solar panels with the RIVER 2?
Yes, provided the panel outputs 11-30V DC at up to 110W and includes an XT60 connector or a compatible XT60 adapter. Third-party panels with MC4 connectors require a separate MC4-to-XT60 adapter cable. Verify the panel's open-circuit voltage (Voc) stays under 30V to avoid exceeding the RIVER 2's input ceiling.
Can I charge the RIVER 2 with solar and use it at the same time?
Yes. The RIVER 2 supports simultaneous charging and discharging. Solar input continues while AC or USB outputs power your devices. The net charge rate is the difference between solar input and device consumption: a 60W solar input and a 30W device draw results in a net 30W charge rate.
What is the EcoFlow RIVER 2 solar input voltage range?
The RIVER 2 accepts 11-30V DC on the XT60 solar port. Most compatible portable panels operate within this range by design. If using a third-party panel, confirm the panel's operating voltage (Vmp) falls within 11-30V before connecting.
Conclusion
The ecoflow river 2 solar setup comes down to one clear choice: the 110W EcoFlow panel matches the station's input ceiling exactly, charges it in approximately 3 hours under ideal sun, and connects natively without adapters. The 60W panel is the right call if weight is the priority. The 160W panel is better saved for an upgrade to the RIVER 2 Max.
Connection takes under 5 minutes. Monitor the display after connecting, adjust your panel angle for maximum wattage, and keep the station in shade. That's the complete setup.
EcoFlow RIVER 2
$189.00
Best entry-level solar-ready station under $200
Price verified March 2026. Free shipping available.
Originally published: March 31, 2026