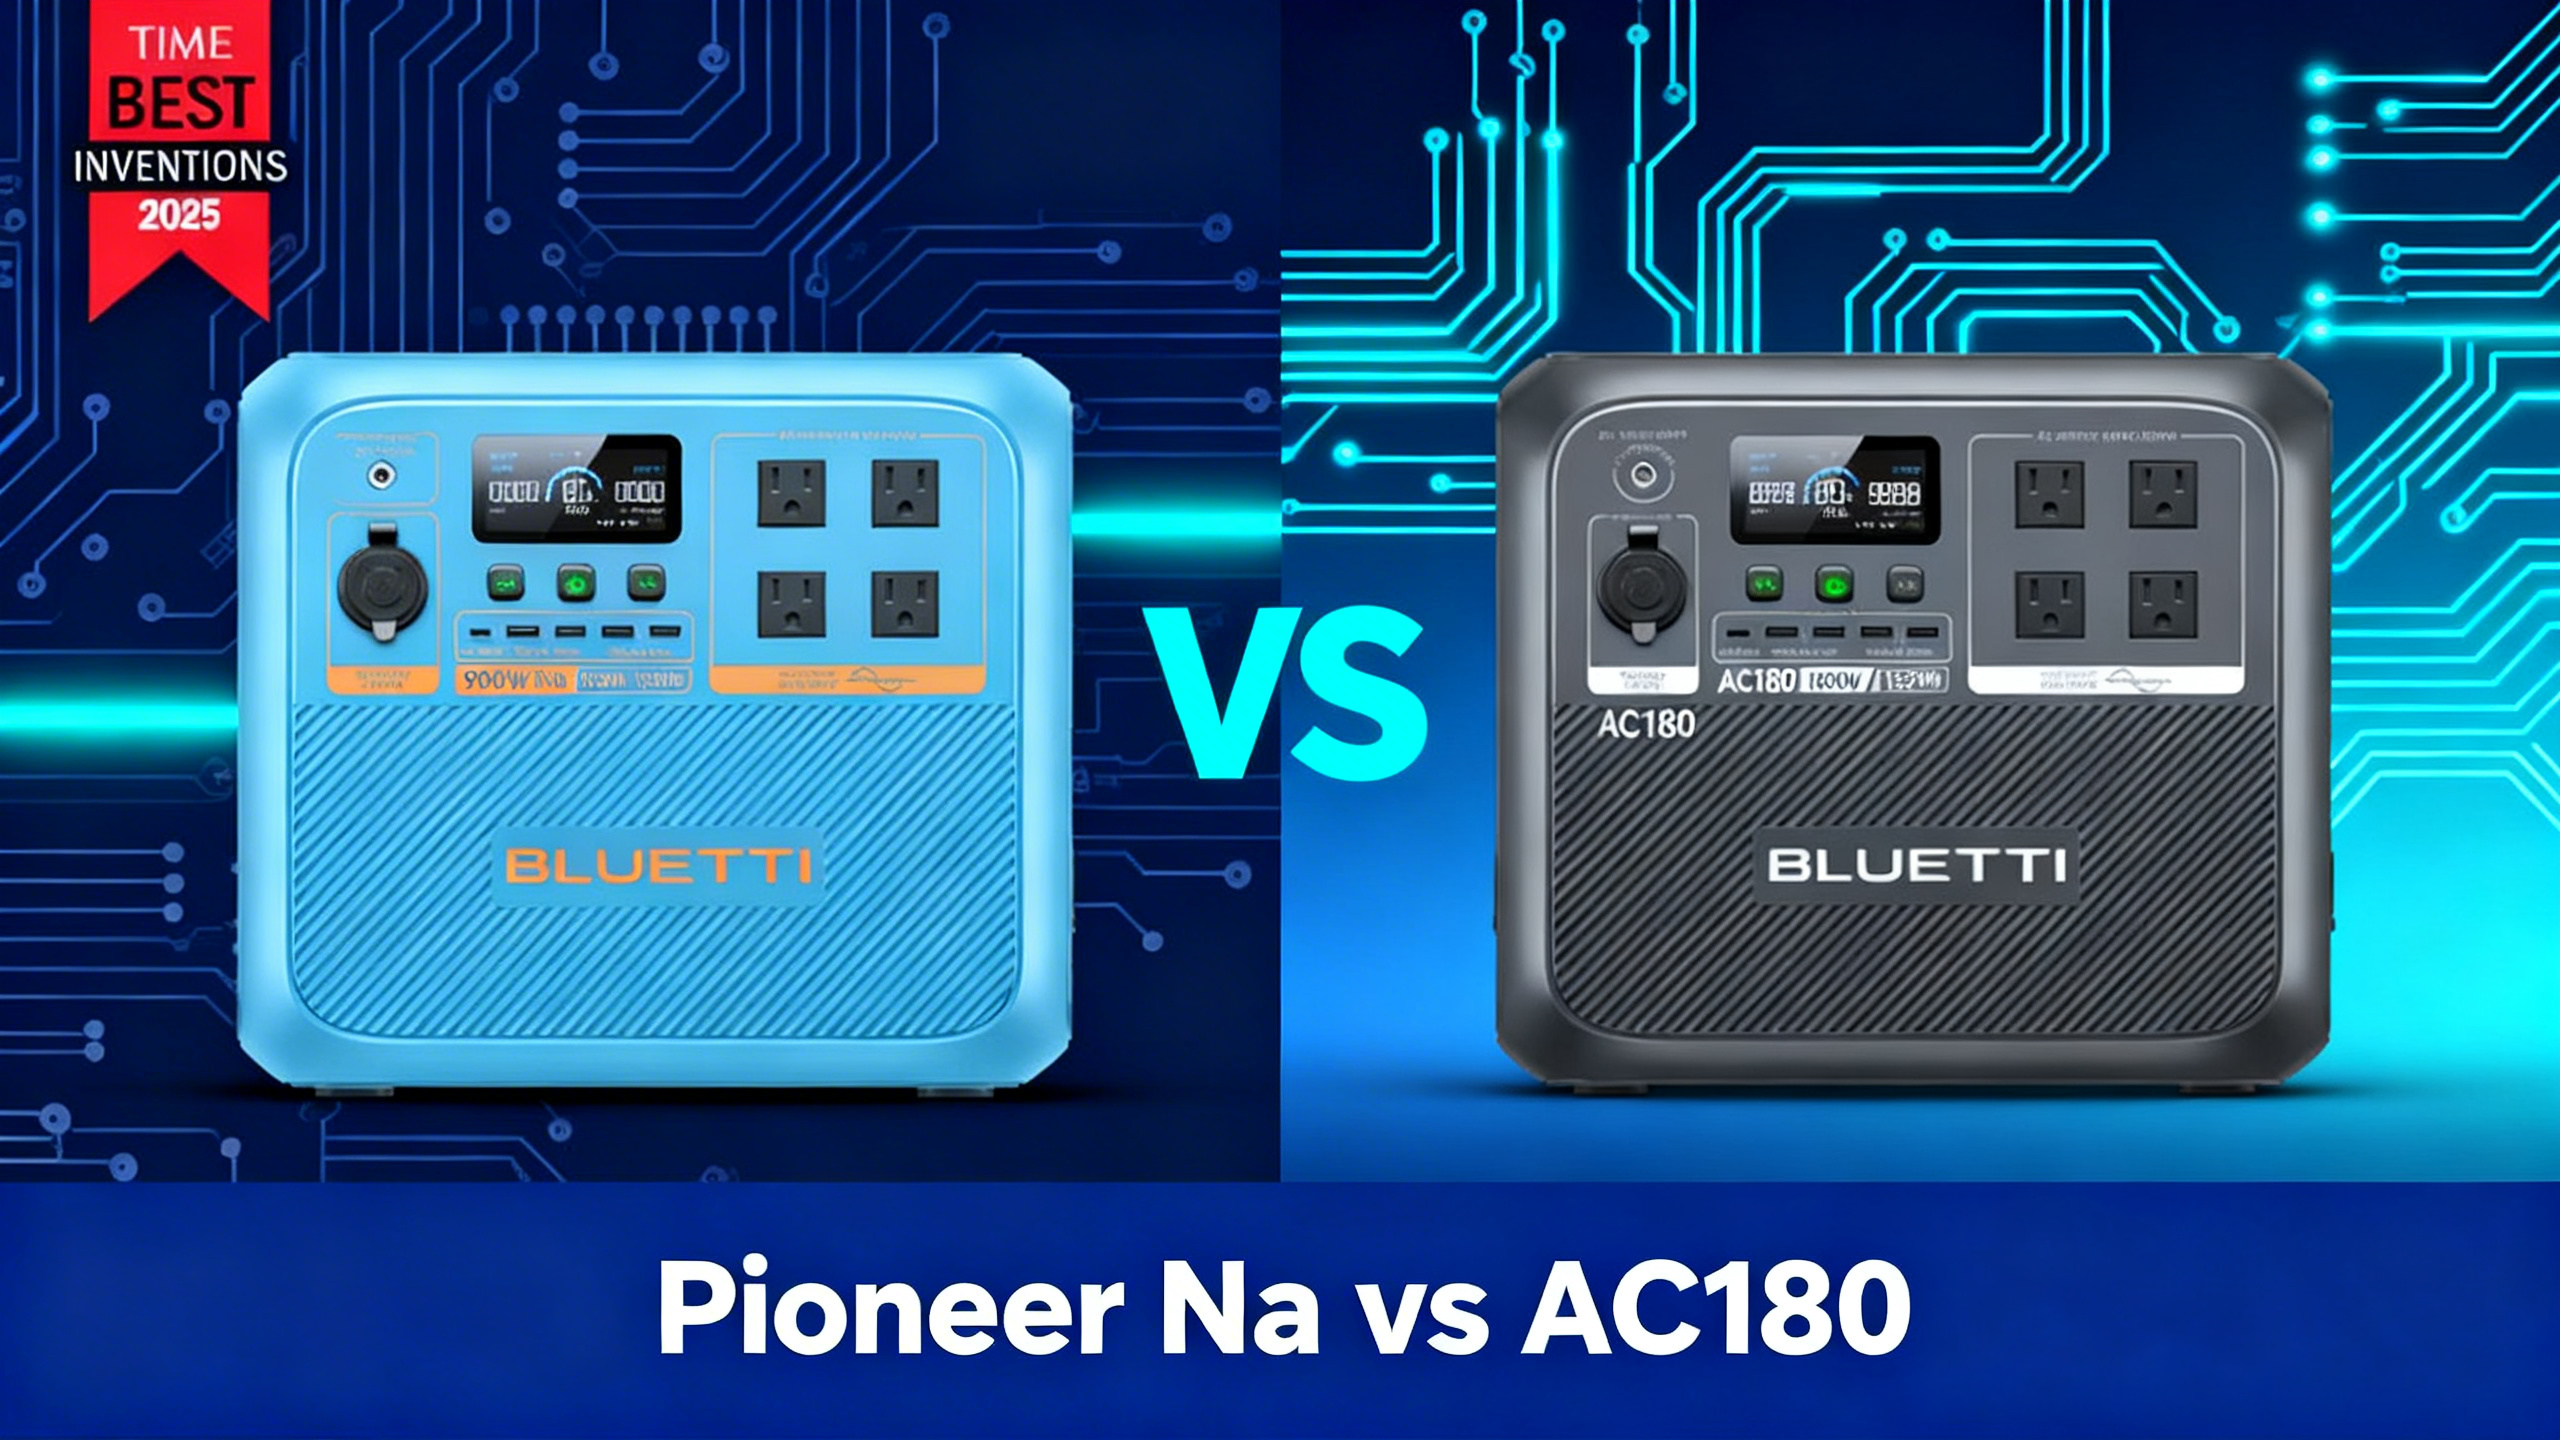
RV Lithium Battery Upgrade Guide: Complete Step-by-Step Installation for 2026

Your RV’s lead-acid battery bank weighs 400+ pounds, requires monthly maintenance, and dies after 3-4 years. What if you could cut that weight in half, eliminate maintenance entirely, and enjoy 10+ years of reliable power?

The shift to lithium battery technology represents one of the most impactful upgrades you can make to your RV’s electrical system. Modern lithium iron phosphate batteries deliver 3,000-5,000 charge cycles compared to just 500-1,000 for traditional lead-acid, weigh 50-70% less, and require zero maintenance. For full-time RVers and serious boondockers, this translates to genuine freedom from constantly monitoring battery levels and planning around limited power capacity.

This guide walks you through everything from understanding lithium chemistry to wiring your new system, with safety protocols and real-world examples at every step. Whether you’re considering drop-in lithium batteries or exploring modern portable power stations as an alternative, you’ll understand exactly what’s involved before spending thousands of dollars on an upgrade.

Quick Answer: Upgrading your RV to lithium batteries involves five core steps: assessing your current system voltage and capacity needs, selecting compatible lithium batteries or power stations, updating your charging system including converter and inverter, installing proper battery management components, and testing the complete system under load. Budget $2,000-6,000 for DIY installation depending on capacity, or $4,000-10,000 if you hire a professional electrician.

Before diving into installation specifics, you need to understand why lithium works differently than what you’re used to. Your charging system, solar controller, and even some appliances may need updates to work safely with lithium chemistry. Don’t worry if this feels overwhelming: we’ll break down each component and explain exactly what you need to consider.

Jackery Explorer 2000 Plus portable power station for RV lithium battery upgrade

Understanding Lithium Battery Technology for RVs

The chemistry behind lithium batteries explains why they outperform lead-acid so dramatically. When you understand what makes LiFePO4 different, you’ll make better decisions about which specific products fit your RV setup and usage patterns.

LiFePO4 vs Traditional Lead-Acid: The Science

Lithium iron phosphate chemistry, usually shortened to LiFePO4, is the safest lithium variant for RV applications. The iron phosphate cathode remains stable at high temperatures, unlike other lithium chemistries that risk thermal runaway. This stability matters when your batteries sit in an RV compartment that reaches 120°F in summer sun.

The density advantage is substantial. LiFePO4 batteries pack 125-150 watt-hours per kilogram compared to lead-acid’s 30-50 Wh/kg. A 200-amp-hour lithium bank weighs around 60 pounds, while an equivalent lead-acid setup tips the scales at 240 pounds. If you’re approaching your RV’s weight limits, this difference often means the upgrade is possible when it wouldn’t be otherwise.

⚡ LiFePO4 vs Lead-Acid: Side-by-Side Comparison

Weight
50-70%
Lighter than Lead-Acid
Cycle Life
3,000-5,000
vs 500-1,000 cycles
Usable Capacity
100%
vs 50% max DoD
Maintenance
Zero
vs Monthly checks
Efficiency
95%
vs 80% lead-acid
Cost per Cycle
$0.35
vs $0.65 lead-acid

Depth of discharge tells an even more important story. You can use 100% of a lithium battery’s rated capacity without damaging it. Lead-acid batteries should never drop below 50% state of charge, meaning a “200Ah” lead-acid bank only gives you 100Ah of usable power. This isn’t just a spec sheet difference: it changes how you think about power planning.

The discharge curve matters for practical use. Lead-acid voltage drops steadily as the battery depletes, so your lights dim and appliances struggle as you approach 50% capacity. Lithium maintains stable voltage until around 10% remaining charge, then drops sharply. Your refrigerator runs at full efficiency whether the battery is 90% full or 20% full.

Why Portable Power Stations Are Changing the Game

The traditional approach involves buying individual lithium cells, a battery management system, an inverter, and connecting everything to your RV’s electrical system. It works, but it requires electrical knowledge and permanent modifications to your rig.

Portable power stations like the Jackery Explorer 2000 Plus or Bluetti AC300 package everything into a single unit. The battery cells, BMS, pure sine wave inverter, charge controller, and monitoring display all live in one box. You’re essentially buying a complete electrical system that happens to be portable.

💡 Skip Traditional Wiring? Consider Portable Power Stations

Jackery Explorer 2000 Plus portable power station for RV

Jackery Explorer 2000 Plus – Complete RV power solution with no installation required

  • 2,042Wh capacity – Run refrigerator 20-24 hours
  • 3,000W continuous output (6,000W surge) – Powers most RV appliances
  • Expandable to 12kWh with 5 additional battery packs
  • 2-hour full charge via AC + solar input
  • LiFePO4 battery – 10-year lifespan with 4,000 cycles

$1,599 $1,999 | Free shipping

View Jackery 2000 Plus Details →

The advantages go beyond simplicity. Because the unit isn’t permanently wired into your RV, you can use it for tailgating, power outages at home, or projects in your garage. When you sell your RV, the power station comes with you. You’re not leaving $3,000 worth of batteries bolted to someone else’s rig.

However, these systems have real limitations you need to understand. A Jackery Explorer 2000 Plus provides 2,042Wh of capacity. That’s equivalent to about 170Ah at 12 volts: adequate for weekend trips but potentially tight for full-time living. The AC300 with one B300 battery offers 3,072Wh, comparable to 256Ah at 12 volts. Both can expand with additional battery modules, but you’re still limited compared to building a custom bank with eight or ten individual lithium cells.

Cost per watt-hour runs slightly higher with power stations. The 2,042Wh Jackery typically sells for $1,599, working out to $0.78 per watt-hour. Battle Born 100Ah batteries at $949 each provide 1,280Wh, or $0.74 per watt-hour. The difference isn’t huge, but it compounds when you need serious capacity.

Battery Management Systems (BMS) Explained

Every lithium battery needs a BMS protecting it from conditions that cause permanent damage or safety issues. The BMS monitors cell voltage, temperature, and current flow, shutting down the system if anything goes outside safe parameters.

Individual cells in a battery pack don’t charge or discharge at exactly the same rate. Over time, this causes voltage imbalances where some cells are fuller than others. The BMS actively balances cells by bleeding excess charge from the fullest cells or directing more charging current to depleted cells. Without this balancing, your battery bank’s capacity and lifespan suffer.

⚠️ Critical Safety Note: LiFePO4 shouldn’t charge below 32°F. Charging a frozen lithium battery causes lithium plating that permanently reduces capacity. Quality BMS systems include temperature sensors that prevent charging in freezing conditions. Some advanced units include internal heating elements that warm the battery before allowing charge current.

Temperature protection matters especially in RVs where battery compartments experience extreme conditions. Drop-in replacement batteries have the BMS built into the battery case. When you buy a portable power station, the BMS is integrated into the unit’s control system.

Calculating Your Actual Power Needs

Before spending thousands on batteries, calculate what you actually use. RVers consistently overestimate their power consumption, leading to oversized battery banks that cost more and weigh more than necessary.

📊 Typical RV Daily Power Consumption

🥶
Refrigerator
72 Ah/day
8A × 40% duty cycle × 24h
💡
LED Lighting
24-48 Ah/day
4 lights × 6 hours evening
💧
Water Pump
5-10 Ah/day
Typical daily cycling
📱
Devices Charging
10-20 Ah/day
Phones, laptops, tablets
🔥
Furnace Fan
60-80 Ah/day
Cold weather camping
❄️
Air Conditioner
300+ Ah/day
1,500W × 6hrs running
Typical Moderate Use Total
100-120 Ah/day
✓ Multiply by 1.5 for safety margin = 150-180Ah lithium capacity needed

The Jackery Explorer 2000 Plus with 2,042Wh capacity provides approximately 170Ah at 12 volts. That handles 100-120Ah daily use with comfortable headroom. The Bluetti AC300 with a single B300 battery offers 3,072Wh or 256Ah at 12 volts, suitable for 150-180Ah daily consumption.

For heavy power users running air conditioning, microwaves, or power tools, you need to calculate watt-hours instead of amp-hours. A 1,000-watt microwave used for 15 minutes daily consumes 250 watt-hours. A 13,500 BTU air conditioner draws 1,500-1,800 watts while running. If it runs 6 hours during a hot afternoon, that’s 9,000-11,000 watt-hours just for cooling.

Assessing Your Current RV Electrical System

You can’t upgrade to lithium without understanding what you’re starting with. Your RV’s existing electrical components determine what stays, what needs replacing, and where complications might arise.

Identifying Your System Voltage

Most RVs operate on 12-volt DC systems, but some larger units use 24-volt or even 48-volt configurations. Check your battery bank. If you see multiple 6-volt batteries wired together, you have a 12-volt system using pairs of batteries in series.

Look at your existing batteries’ labels for voltage ratings. A fully charged 12-volt lead-acid bank reads 12.6-12.8 volts at rest with a multimeter. Your new lithium system must match this voltage. Don’t try to convert a 12-volt RV to 24-volt lithium unless you’re prepared to replace every 12-volt appliance, light fixture, and wire in your rig.

Understanding Your Converter and Charger Setup

Your RV’s converter transforms 120-volt shore power into 12-volt DC for charging batteries. Older converters use charging profiles designed for flooded lead-acid batteries. These profiles damage lithium batteries or prevent them from charging properly.

Find your converter’s make and model number. It’s usually located near your breaker panel. Progressive Dynamics, WFCO, Iota, and Powermax are common brands in RVs built in the last 20 years. Research whether your converter model supports lithium charging profiles. Many modern converters have replaceable control modules that switch between battery types.

💡 Pro Tip: Progressive Dynamics sells a lithium charging module (the PD9100L series) that drops into compatible converter units. WFCO converters typically need complete replacement since they don’t offer lithium upgrade kits.

If your converter doesn’t support lithium, budget $300-900 for a replacement unit. This isn’t optional. Using the wrong charging profile either damages your expensive new batteries or leaves them chronically undercharged despite being plugged into shore power.

Evaluating Your Solar Charging System

Your existing solar panels work fine with lithium batteries. Photovoltaics don’t care about battery chemistry. Your solar charge controller, however, might need replacement.

PWM charge controllers (pulse width modulation) waste significant power with lithium batteries. They’re designed for lead-acid voltage curves and can’t efficiently transfer energy when connected to lithium. If you have a PWM controller, plan to upgrade to MPPT.

MPPT controllers (maximum power point tracking) are more sophisticated and usually offer lithium charging profiles. Check your controller’s manual for lithium compatibility. Victron, Renogy, Epever, and other quality brands often include lithium settings. For more details on optimizing your solar setup, check out our complete guide to solar panel wiring.

Jackery SolarSaga 100W solar panel for RV charging
Jackery SolarSaga 100W foldable bifacial solar panel with IP68 waterproof rating

Some newer power stations include built-in MPPT controllers and accept direct solar panel input. The Jackery 2000 Plus handles up to 800 watts of solar input. The Bluetti AC300 accepts up to 1,200 watts solar. If you go this route, your RV’s existing solar panels connect to the power station instead of your RV’s charge controller.

Safety First: Pre-Installation Checklist

Working with RV electrical systems poses real risks. Lithium batteries store enormous energy in a small package. A 200Ah battery at 12 volts contains 2,400 watt-hours of energy that can discharge in seconds if short-circuited. That kind of current flow creates arc flash hot enough to melt metal and cause severe burns or fires.

⚠️ Critical Safety Requirements:

  • Turn off all power sources before touching wiring
  • Disconnect shore power at the pedestal, not just at your RV’s inlet
  • Remove negative terminal first when disconnecting batteries
  • Work during daylight hours with good ventilation
  • Have a fire extinguisher rated for electrical fires within reach
  • Use quality multimeter for voltage and continuity testing

If anything in this section makes you uncomfortable, hire a certified RV technician or mobile service. Professional installation typically costs $500-1,500 depending on your system’s complexity. That’s expensive, but it’s cheaper than fire damage or medical bills from electrical shock. Our RV installation guide covers everything you need to know.

Choosing Between Drop-In Batteries and Power Stations

The lithium upgrade decision splits into two distinct paths: traditional drop-in batteries that replace your existing battery bank, or integrated power stations that function as standalone electrical systems. Your choice affects installation complexity, long-term flexibility, and total cost.

Feature Drop-In Batteries Power Stations
Installation Complexity ⚠️ Moderate to High ✅ Plug-and-Play
Maximum Capacity ✅ 10,000Wh+ possible ⚠️ 12,288Wh max
Cost per Wh ✅ $0.70-0.74/Wh ⚠️ $0.78-0.85/Wh
Portability ❌ Permanent installation ✅ Move between locations
Monitoring Separate system needed ✅ Built-in app control
Inverter Included ❌ Purchase separately ✅ Pure sine wave included
Expandability ✅ Add batteries anytime ⚠️ Brand-specific modules
Efficiency (12V loads) ✅ 95% (direct DC) ⚠️ 80% (double conversion)
Best For Full-timers, heavy users Weekend warriors, flexibility

Drop-In Lithium Battery Options

Drop-in batteries are designed to fit where your lead-acid batteries used to live. They have the same form factor as Group 24, Group 27, or Group 31 lead-acid batteries, with terminals in similar positions. Installation means disconnecting old batteries, connecting new ones, and updating your charging system if needed.

Battle Born makes the most popular drop-in LiFePO4 batteries in the RV market. Their 100Ah 12-volt battery costs $949 and delivers 1,280 watt-hours of usable energy. The company targets the RV segment specifically, so their batteries include low-temperature charge protection, Bluetooth monitoring, and compatibility with standard RV charging systems.

Renogy offers 100Ah and 200Ah lithium batteries at lower price points. Their 200Ah Smart Lithium battery typically runs $799.99 and provides 2,560Wh of capacity: double Battle Born’s capacity for less money per watt-hour. Build quality is solid, though some users report the BMS is more conservative about cutting power during cold weather.

You’ll need multiple batteries to build adequate capacity. A single 100Ah battery rarely provides enough power for comfortable RV living. Two 100Ah batteries in parallel give you 200Ah total, suitable for moderate use. Four 100Ah batteries create a 400Ah bank that handles air conditioning and heavy appliance loads during extended boondocking.

Integrated Power Station Solutions

Power stations consolidate battery, inverter, charge controller, and monitoring into a single unit. You get a complete electrical system that requires no permanent wiring changes to your RV.

🔋 Modular Power for Serious RVers

Bluetti AC300 modular power station with B300 expansion battery for RV

Bluetti AC300 + B300 Battery – Modular system for maximum flexibility

  • 3,072Wh capacity with single B300 battery module
  • 3,000W continuous output (6,000W surge) – Dual 120V/240V
  • Expandable to 12,288Wh with 4× B300 batteries
  • Split-phase 240V capability for large AC units (2× AC300)
  • 1,200W solar input – Dual MPPT charge controllers
  • LiFePO4 battery – 3,500+ cycles to 80% capacity

$2,999 | Free shipping | 30-day returns

View Bluetti AC300 System →

Setup is genuinely plug-and-play. Charge the power station from shore power using the included AC adapter. Connect your RV’s shore power cable to the power station’s AC outputs when you need to run on battery power. Add solar panels to the DC inputs for recharging during boondocking.

The Bluetti AC300 takes a modular approach. The AC300 unit contains the inverter and control system but no battery. You buy B300 battery modules separately. Each B300 adds 3,072Wh of capacity. This modular design lets you scale capacity to your needs and budget, starting with one battery and adding up to four for 12,288Wh total.

🎯 Which System Size Do You Need?

Weekend Warrior
2-3 days off-grid • Fridge + lights + devices
2,000Wh
✓ Jackery 2000 Plus
✓ Covers 100-120Ah daily use
✓ Budget: $1,599
Extended Boondocking
4-7 days off-grid • All appliances except AC
4,000-6,000Wh
✓ Bluetti AC300 + 1-2× B300
✓ Covers 150-200Ah daily use
✓ Budget: $3,000-$5,000
Full-Time Living
Unlimited off-grid • AC + heavy loads
8,000-12,000Wh
✓ Bluetti AC300 + 3-4× B300
✓ Covers 300-400Ah daily use
✓ Budget: $7,000-$9,000

Installation Process: Drop-In Lithium Batteries

If you’ve decided on drop-in batteries, the installation process follows a logical sequence. Don’t skip steps or assume your RV matches standard configurations. Verify everything before making permanent changes.

Step 1: Remove Existing Lead-Acid Batteries

Start by taking photos of every wire connection on your existing batteries. Use your phone to shoot close-ups showing which cable connects to which terminal. Label cables with masking tape and a marker if you’re worried about confusion later.

Disconnect the negative terminal on your battery bank first. This breaks the ground connection and makes the entire system safe to work on. Remove the positive terminal connection next. Keep the positive cable away from any metal surfaces.

⚠️ Safety Warning: Lead-acid batteries are heavy. A Group 27 battery weighs 65-75 pounds. Don’t try to muscle them out at an awkward angle. Get help lifting if needed, because dropping a battery on your foot ruins your whole day.

Clean the battery compartment while it’s empty. Years of battery operation leave corrosion deposits, dirt, and sometimes leaked acid residue. Use a wire brush on battery terminals and cable ends to remove corrosion. Baking soda dissolved in water neutralizes acid residue from lead-acid batteries.

Step 2: Install Lithium Batteries

Position your first lithium battery in the compartment. Most drop-in batteries are lighter than the lead-acids they replace, but they’re still 30-40 pounds. Orient the terminals correctly. Positive and negative positions need to match your existing cable positions, or you’ll need to fabricate new cables.

Connect batteries in parallel if you’re installing multiple units. Run a heavy gauge cable (2/0 AWG or 4/0 AWG depending on your total amp-hour capacity) from the positive terminal of one battery to the positive terminal of the next battery. Repeat for all positive terminals. Do the same for negative terminals.

⚡ Proper Parallel Battery Wiring

Battery 1
⊕ ⊖
100Ah
Battery 2
⊕ ⊖
100Ah
Battery 3
⊕ ⊖
100Ah
Battery 4
⊕ ⊖
100Ah

✓ Key Wiring Rules:

  • All positive terminals connected together
  • All negative terminals connected together
  • Main positive cable to Battery 1 (front-left)
  • Main negative cable to Battery 4 (rear-right)
  • This forces equal current distribution
  • Use 2/0 AWG or 4/0 AWG cable for 400Ah+ banks

Torque terminal connections to manufacturer specifications. Battle Born recommends 90 inch-pounds for their terminal bolts. Over-tightening cracks the battery case around the terminal post. Under-tightening creates resistance that wastes power and generates heat. Use a torque wrench rather than guessing.

Step 3: Configure Charging Systems

Your RV’s converter probably needs updating or replacement to charge lithium batteries properly. Turn off all power before working on the converter. Disconnect shore power at the pedestal.

For converters with lithium upgrade modules (like Progressive Dynamics), removing the old module and installing the new one usually involves pulling off the converter’s front panel, unplugging a small circuit board, and plugging in the replacement. The process takes 10 minutes once you locate your converter.

Set the converter to lithium charging mode using dip switches, buttons, or a settings menu. Lithium charging profiles typically use:

  • Bulk charge: 14.4-14.6V
  • Float voltage: 13.6-13.8V
  • No equalization cycle

Solar charge controller configuration follows similar logic. Access the controller’s settings through its display panel or via Bluetooth app. Change battery type from lead-acid (AGM/Flooded/Gel) to lithium or LiFePO4. Set bulk voltage to 14.4V and float to 13.6V as a starting point. Planning to use this in winter? Make sure your BMS has cold-weather protection.

Optimizing System Performance

Installation is just the start. Getting the most from your lithium upgrade requires optimizing how you use power and managing charge cycles.

Maximizing Solar Efficiency

Solar panels rarely deliver their rated output. A 200-watt panel might produce 150-160 watts under ideal conditions and drop to 100 watts or less when angled poorly or partially shaded.

Angle your panels toward the sun throughout the day if they’re portable. Tilting them perpendicular to the sun’s rays captures 20-40% more power compared to flat-mounted panels. This matters enormously when you’re trying to recharge 3,000Wh of battery capacity from 400 watts of solar. Even on cloudy days, proper angling makes a significant difference.

💡 Pro Tip: Clean panels regularly. Dust, bird droppings, and pollen block sunlight and reduce output. A monthly wash with soap and water maintains performance. Don’t use abrasive cleaners or rough scrub brushes that scratch the panel surface.

☀️ Complete Solar Charging Solution

Jackery Solar Generator 2000 Plus with SolarSaga 200W panels for RV

Jackery Solar Generator 2000 Plus with SolarSaga 200W panels

  • Complete off-grid solution – Power station + 2× 200W solar panels
  • 2-hour solar recharge in optimal conditions
  • 400W total solar input – IBC technology for max efficiency
  • Foldable & portable panels – Adjustable kickstands included
  • IP68 waterproof rating – Weather-resistant design

$3,099 | Bundle saves $500+ | Free shipping

View Solar Generator Bundle →

The Jackery SolarSaga 200W panels work well with the 2000 Plus system, giving you 800W total input capacity with four panels. That delivers roughly 240 amp-hours of charge per day in good sun conditions: enough to offset heavy usage and fully recharge the 2,042Wh battery in 3-4 hours of peak sun.

Managing Load to Extend Runtime

Your biggest power hogs determine how long your battery lasts. Air conditioning dominates power use when running. A 13,500 BTU AC unit draws 1,500-1,800 watts, eating through a 2,000Wh battery in just over an hour.

Refrigerators run continuously but cycle on and off, averaging 100-150 watts over 24 hours. That’s 2,400-3,600 watt-hours daily just for refrigeration. LED lighting uses minimal power, typically 5-10 watts per fixture. Don’t stress about lighting: it’s not your problem. For detailed guidance on optimizing your power usage, see our load management guide.

Appliance Wattage Typical Daily Use Daily Wh Runtime (2000Wh)
RV Refrigerator 100-150W avg 24 hours 2,400-3,600 13-20 hours
Air Conditioner (13.5K BTU) 1,500-1,800W 6 hours 9,000-11,000 1-1.3 hours
Microwave 1,000-1,200W 15 minutes 250-300 1.7-2 hours
LED Lighting (4 fixtures) 20-40W total 6 hours 120-240 50-83 hours
Laptop Charging 65-100W 4 hours 260-400 20-31 hours
Coffee Maker 800-1,200W 10 minutes 130-200 1.7-2.5 hours

Frequently Asked Questions

Can I mix lithium and lead-acid batteries in the same bank?

No, you should never connect lithium and lead-acid batteries in the same bank. They have fundamentally different charging profiles and discharge characteristics. The BMS in lithium batteries will behave erratically when connected to lead-acid cells, and the lead-acid batteries will be damaged by lithium charging voltages. If you’re upgrading, replace all batteries at once with lithium rather than trying to gradually transition.

How long do lithium RV batteries actually last?

Quality LiFePO4 batteries are rated for 3,000-5,000 charge cycles before capacity drops to 80% of original rating. In typical RV use where you cycle the battery once daily, this translates to 8-13 years of service life. Batteries don’t suddenly die after reaching cycle limits. They gradually hold less charge. Most RVers will sell their RV or upgrade to newer equipment before lithium batteries need replacement.

Do I need a special charger for lithium batteries?

Your RV’s existing converter or charger needs to support lithium charging profiles. This typically means bulk charge voltage of 14.4-14.6V and float voltage of 13.6-13.8V, with no equalization cycle. Many modern converters include lithium modes accessible through settings or replaceable control modules. Older converters designed only for lead-acid need complete replacement. Check your converter’s specifications before assuming compatibility.

Can lithium batteries charge in freezing temperatures?

Most lithium batteries include low-temperature charging protection that prevents charging below 32°F. Discharging works fine in cold weather, though capacity temporarily drops. If you camp in freezing conditions regularly, look for lithium batteries with built-in heating elements, or keep your power station inside the heated living space. Attempting to charge frozen lithium batteries without protection causes permanent damage through lithium plating on the battery’s anode.

Are portable power stations as good as drop-in batteries?

Portable power stations excel at convenience and plug-and-play installation, while drop-in batteries offer better value per watt-hour and higher maximum capacity. Power stations include everything you need in one package: battery, inverter, charge controller, monitoring. This makes them ideal for RVers who don’t want to modify their electrical system. Drop-in batteries require more installation work but support building larger capacity banks and cost less when you need serious power storage. Choose based on your priorities: convenience versus maximum capacity and value.

What size lithium battery bank do I need for full-time RV living?

Full-time RVers typically need 300-600Ah of lithium capacity depending on usage patterns. Heavy users running air conditioning or working from their RV with multiple computers need 600Ah or more. Moderate users with efficient appliances and conservative habits function well with 300-400Ah. Calculate your actual daily consumption by listing every load and its watt-hour usage, then multiply by 1.5 for headroom. Match your battery bank to 2-3 days of consumption so you’re not constantly charging.

Do lithium batteries work with my solar panels?

Your existing solar panels work fine with lithium batteries. Photovoltaic panels don’t care about battery chemistry. Your solar charge controller, however, needs lithium compatibility. MPPT charge controllers typically include lithium settings you can configure through the controller’s menu. PWM controllers are less efficient with lithium and should be upgraded to MPPT. The controller must deliver proper lithium charging voltages (14.4-14.6V bulk, 13.6-13.8V float) and avoid equalization cycles that damage lithium cells.

Are lithium batteries safe in hot RV environments?

LiFePO4 chemistry is the safest lithium variant for hot environments. The iron phosphate cathode remains stable up to around 113°F, beyond which the BMS typically shuts down charging to protect the battery. Keep batteries in ventilated compartments rather than sealed boxes. Most quality lithium RV batteries include thermal sensors that trigger BMS protection before dangerous temperatures occur. The fire risk with properly manufactured LiFePO4 batteries is substantially lower than older lithium-cobalt chemistries.

Conclusion and Next Steps

Upgrading your RV to lithium batteries represents a significant improvement in your electrical system’s capability and convenience. The weight savings, maintenance elimination, and usable capacity gains make boondocking and off-grid living genuinely practical for RVers who previously felt chained to campground hookups.

You now understand the core decision point: drop-in lithium batteries offer maximum flexibility and best value per watt-hour for serious RVers building large capacity systems, while portable power stations provide unmatched simplicity and plug-and-play convenience for weekend warriors or those uncertain about permanent modifications.

The installation process isn’t trivial. Whether you’re wiring drop-in batteries or integrating a power station, you need to understand your RV’s electrical architecture and make informed decisions about charging systems, monitoring, and safety. Don’t rush the project. Take time to verify compatibility, plan your layout, and test thoroughly before depending on the system for extended boondocking.

🎯 Your Action Plan

1. Measure & Calculate
Track your actual power usage for 3-7 days. Measure battery compartment dimensions. Document converter and solar controller models.
2. Choose Your Path
Drop-in batteries for full-time/heavy use. Power stations for weekend/convenience. Budget $2,000-6,000 DIY or $4,000-10,000 professional.
3. Plan & Install
Order all components at once. Schedule installation when you can work without RV-use pressure. Test thoroughly before first trip.

Start with accurate power consumption measurements rather than guessing. Track what you actually use over several typical camping trips. This data drives better decisions about battery capacity, solar requirements, and whether your budget matches your needs.

Safety remains paramount throughout this process. Lithium batteries store enormous energy in compact packages, and mistakes with electrical connections can cause fires or equipment damage. If you’re uncertain about any aspect of installation, hiring a qualified RV technician costs less than replacing fire-damaged components or dealing with insurance claims.

🔶 Weekend Warrior Choice

Jackery Explorer 2000 Plus

Perfect for 2-3 day trips

  • 2,042Wh capacity
  • 3,000W output
  • Plug-and-play setup
  • 10-year lifespan

$1,599

View Jackery 2000 Plus →

🔷 Full-Timer Solution

Bluetti AC300 + B300

Expandable for extended living

  • 3,072Wh capacity
  • 3,000W output
  • Expandable to 12kWh
  • Split-phase 240V option

$2,999

View Bluetti AC300 System →

The lithium upgrade opens new camping possibilities. You’ll boondock longer, run appliances you couldn’t before, and eliminate anxiety about battery levels. These benefits matter more to some RVers than others. Only you can decide whether improved electrical capability is worth several thousand dollars.

For RVers ready to move forward, prioritize understanding your current system before buying batteries. Armed with this information, you’ll choose the right products for your specific situation rather than buying whatever gets recommended most often in RV forums.

After your upgrade, give yourself a few weeks to learn the new system’s characteristics. Lithium batteries behave differently than lead-acid, and your familiar intuitions about battery management need recalibrating. Monitor voltage patterns, track solar charging rates, and experiment with different usage scenarios to build confidence in your new electrical system.

Most importantly, remember that this upgrade serves your RV lifestyle rather than defining it. Lithium batteries enable freedom and flexibility, but they’re tools rather than destinations. Use them to camp in beautiful locations, spend time with people you care about, and experience the adventures that drew you to RV life in the first place.

Leave a Comment