

You've just unboxed your Jackery Explorer 500 and those sleek solar panels are calling your name—but where do you even start? Those connectors, cables, and angles can feel overwhelming if you've never set up a solar system before.
In this guide, I'll walk you through the complete setup process for your Jackery 500 solar generator in under 30 minutes. You'll learn exactly how to connect your panels, optimize charging speed, and troubleshoot common issues—no technical background required.
Setting up Jackery solar charging is actually simpler than it looks. If you can plug in a phone charger, you can do this. By the end of this guide, you'll be harvesting free solar power like a pro.
We'll cover everything from unboxing to your first full charge, including panel positioning, connector types, safety checks, and pro tips to maximize your solar efficiency. For more details on the power station itself, check out our in-depth Explorer 500 review.
What You'll Need (Materials & Tools)
Required Equipment
Before we dive into the setup process, let's make sure you have everything you need. The good news is that Jackery 500 with solar panel systems come with most of what you'll need right in the box.

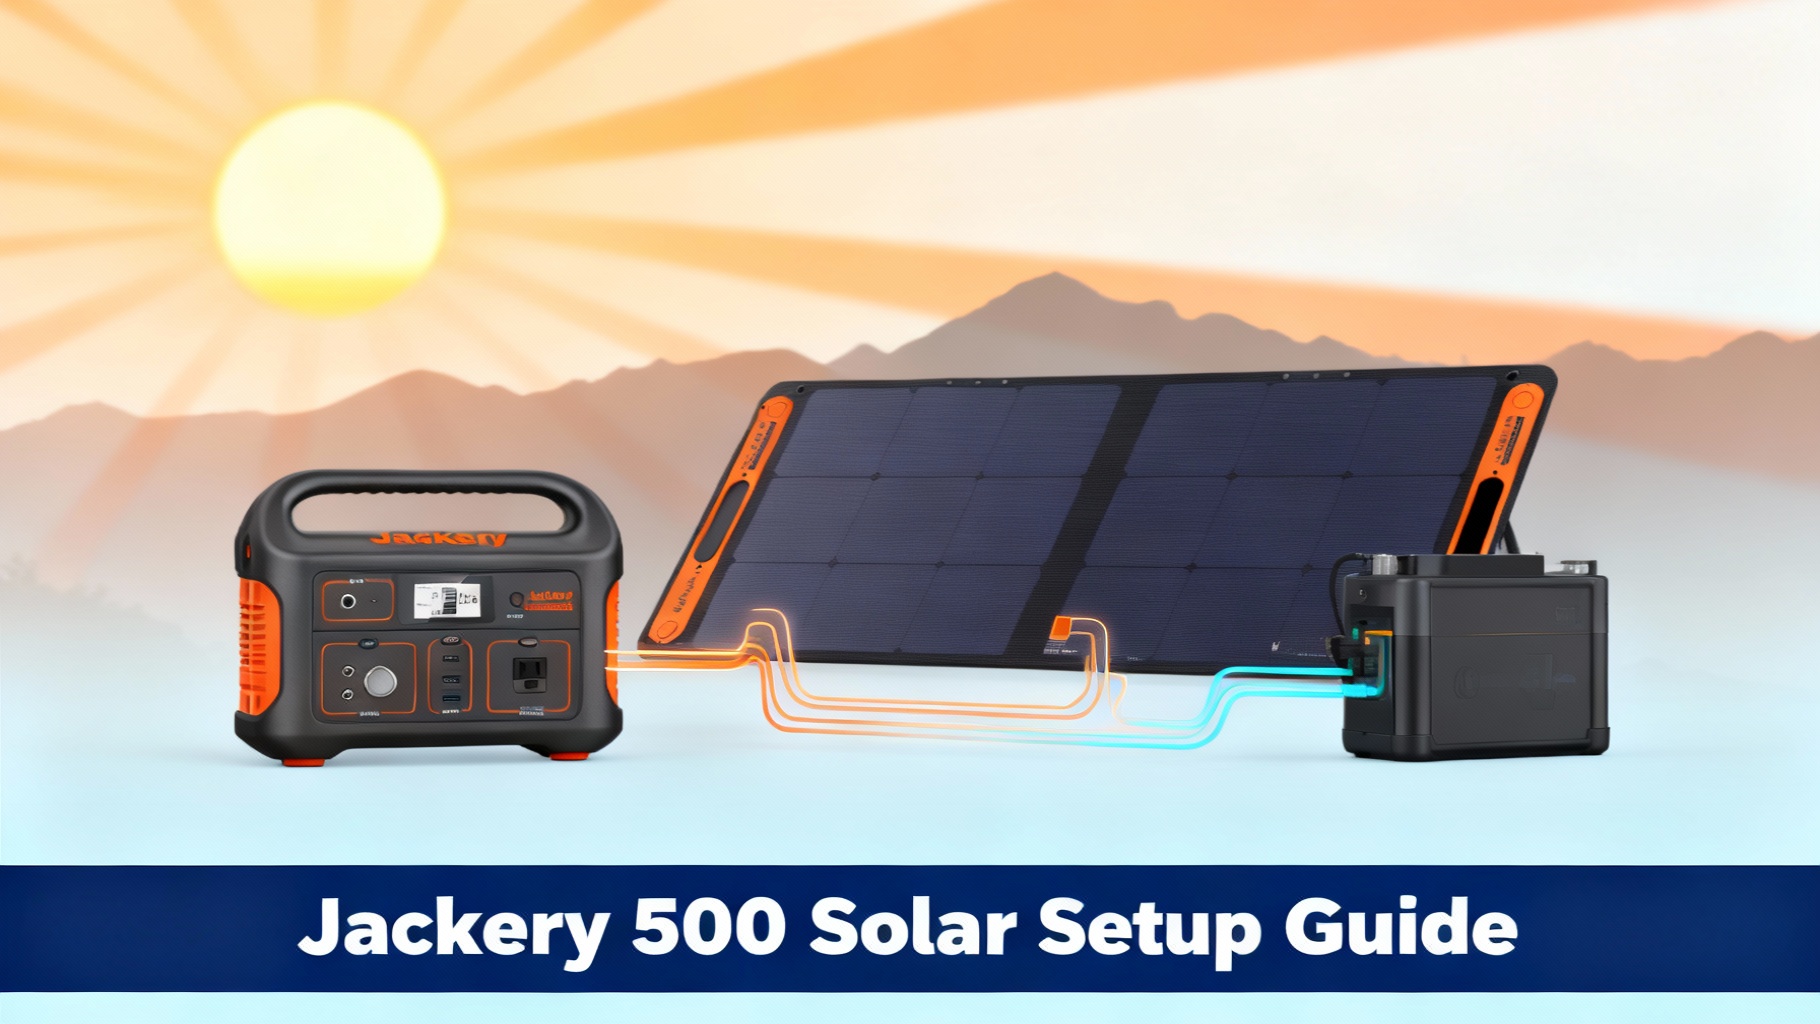
Jackery Explorer 500 – 518Wh, 500W inverter

SolarSaga 100W Panel – Foldable with kickstands
Jackery Explorer 500 is your main power station unit. This portable power station packs 518Wh of capacity with a 500W continuous inverter. At 13.32 pounds, it's portable enough for weekend trips but substantial enough to power your essential devices. The Explorer 500 features multiple output options including AC outlets, USB ports, and a 12V car port.
Jackery SolarSaga 100W Solar Panel is what you'll use to capture sunlight and convert it into usable power. You'll want at least one panel, though using Jackery 500 solar panels in pairs will cut your charging time roughly in half. Each SolarSaga 100W panel is designed specifically for Jackery power stations and includes the necessary adapter cables. Learn more about the SolarSaga 100W panel features.
MC4 to 8mm adapter cable comes included with your SolarSaga panel. This cable is your translator between the solar panel connector MC4 plugs and the Explorer 500's 8mm barrel input port. Don't lose this cable—it's essential for the connection.
Solar panel kickstands are built right into the SolarSaga panels. These adjustable stands let you position your panels at the optimal angle for maximum sun exposure.
Optional But Helpful Items
DC extension cable (16.4 feet) can be a game-changer if you need to position your panels in full sun while keeping your power station in the shade or inside your vehicle. This isn't required for basic setup, but it gives you much more flexibility in real-world conditions.
Solar panel carrying case provides weather protection when you're transporting your panels or storing them between trips. The SolarSaga panels are durable, but a case extends their lifespan.
Cable ties help you manage cables and keep everything organized. Nothing worse than tripping over loose cables or having them blow around in the wind.
Compass app on your smartphone helps you position panels facing south (in the Northern Hemisphere) for maximum solar exposure throughout the day.
Microfiber cloth is useful for cleaning dust and debris off your Jackery solar charger panels. Even a thin layer of dirt can reduce charging efficiency by 20-30%.
Estimated Time & Difficulty
Let's set realistic expectations here. If this is your first time setting up a solar system, budget about 30 minutes for the initial setup. Once you've done it a few times, you'll be able to deploy your system in 10-15 minutes flat.
Setup Time: 15-30 minutes (first time)
Difficulty Level: ⭐⭐☆☆☆ Beginner
Best Conditions: Clear, sunny day (for immediate testing)
Location: Outdoor space with direct sunlight
The difficulty is genuinely low. There are only a few connections to make, and the connectors are designed to fit only one way—you can't plug things in backward. The hardest part is usually finding the optimal panel angle, and we'll walk you through that step-by-step.
| Item | Purpose | Where to Buy | Est. Cost |
|---|---|---|---|
| Jackery Explorer 500 | Main power station unit | Jackery Official | $499 |
| SolarSaga 100W Panel | Solar panel to charge Jackery (1-2 panels) | Jackery Official | $299 each |
| Solar Generator Bundle | Complete system (Explorer 500 + 1 panel) | Jackery Bundle | $799 (Save $99) |
| MC4 Adapter Cable | Connect panel to power station | Included with panel | Included |
| DC Extension Cable | Optional: Longer distance connection | Jackery Official | $39 |
🏆 Best Value Bundle Recommendation
Why we recommend the Solar Generator 500 Bundle: You save $99 compared to buying separately, and everything is guaranteed to work together perfectly. No compatibility guessing, no adapter hunting.
Check Bundle Price & Availability →
$799 | Free shipping | Bundle includes: Explorer 500 + SolarSaga 100W + All cables
Before You Start: Safety & Preparation Checklist
Before you make any connections, let's cover some important safety points. Solar systems are generally very safe, but a few precautions will protect both you and your equipment.
Safety Precautions
⚠️ Important: Never connect solar panels while the power station is turned on. Always power down your Explorer 500 completely before plugging in or unplugging solar panels. This prevents voltage spikes that could damage the internal charging circuit.
Keep connections dry. Water and electricity don't mix. If there's rain or heavy dew, wait until conditions dry out before setting up your solar system. The Jackery solar panel connector type MC4 connectors are weather-resistant but not waterproof when disconnected.
Avoid overheating. Don't set up your solar panels or power station on hot surfaces like car hoods or dark asphalt. The Explorer 500 has thermal protection, but excessive heat reduces charging efficiency and can shorten battery lifespan.
Check for damage before setup. Inspect your Jackery solar charging cable and connectors for any cracks, fraying, or damage. A damaged cable can cause short circuits or reduce charging performance. If you spot damage, contact Jackery support before proceeding.
Don't exceed Jackery 500 solar input limits. The Explorer 500 can handle up to 100W of solar input. Using two SolarSaga 100W panels won't damage the unit because the built-in MPPT controller regulates the input, but don't connect random solar panels without checking compatibility first.
Position panels on stable surfaces. Wind can topple poorly positioned panels. Make sure your kickstands are fully deployed and the panel is on level ground. If it's windy, consider weighing down the kickstands with small rocks or gear bags.
Pre-Setup Checklist
Let's make sure everything is ready before we start connecting cables.
Verify your Explorer 500 is charged to at least 20%. While can you use Jackery while solar charging? Yes, but having some initial charge helps the system boot up properly and display accurate solar input readings on the LCD screen.
Locate your user manual. Keep the official Explorer 500 user manual handy in case you need to reference specific technical details or troubleshooting steps. The manual includes important warranty information and safety specifications.
Clear your work area. Set up in a space where you have room to work and can easily access both sides of the power station and solar panels. You'll be moving around a bit to optimize panel angles.
Check the weather. This sounds obvious, but you want at least a few hours of solid sunlight for your initial test. Partly cloudy conditions will work, but you won't see peak performance numbers that help you verify everything is working correctly.
Have your phone ready. You might want to use a compass app for panel positioning and take photos of your setup for future reference. The first time always takes longer, so document what works.
Step 1: Position Your Solar Panels for Maximum Exposure
This is where most beginners make mistakes that cost them 30-50% of their potential charging speed. Panel positioning matters more than almost anything else in your setup.

Find Direct Sunlight
Walk around your campsite, yard, or wherever you're setting up and look for the sunniest spot. You want direct sunlight hitting your panels with zero shade. Even partial shade from a tree branch can dramatically reduce output.
Here's what to look for: hold your hand up where you plan to position the panel. If you see a crisp, dark shadow on the ground, that's direct sun. If the shadow is fuzzy or faint, you're dealing with filtered light through clouds or trees. That filtered light might look bright, but it's not enough for optimal solar charging.
Morning through early afternoon is generally best for solar charging in most locations. If you're setting up in the afternoon, position panels to capture the western sun. The sun's position changes throughout the day, so you'll want to check back and adjust angles every few hours for maximum efficiency.
Deploy the Kickstands
The SolarSaga 100W panels have built-in kickstands on the back. Unfold the panel completely and locate the two metal kickstand arms. Pull them away from the panel body—they'll click into place at preset angles.
The SolarSaga offers multiple angle positions. For most situations in summer months, the steeper angle (closer to vertical) works well. In winter when the sun is lower in the sky, you'll want the shallower angle. Don't worry about getting this perfect on your first try—we'll check the LCD screen in a minute to see actual input watts.
Plant the kickstands firmly on the ground. If you're on soft dirt or sand, press them down until they're stable. On hard surfaces like concrete or rock, the rubber feet provide decent grip, but watch out for wind.
Angle Optimization
💡 Pro Tip: For optimal panel positioning, use a solar angle calculator to determine the perfect tilt for your location and season. Generally, face panels directly toward the sun—south in the Northern Hemisphere, north in the Southern Hemisphere.
Here's the rule of thumb that works in most situations: face your panels directly toward the sun. If you're in the Northern Hemisphere, this generally means facing south. Southern Hemisphere? Face north.
For the angle, there's a technical formula based on your latitude, but here's the practical approach that works: adjust your panel until the shadow the panel casts falls directly behind it—not to either side. That means the panel face is perpendicular to the sun's rays.
You'll know you've got good positioning when you connect everything in the next step and see the input watts on your Explorer 500's LCD screen close to the panel's rated output. In perfect conditions with one SolarSaga 100W panel, you should see 75-95W. If you're seeing 40-60W, your angle is probably off.
☀️ Solar Panel Angle Quick Reference
Summer (June-Aug)
Steeper angle (60-70°)
Sun is high in sky
Fall/Spring
Medium angle (45-55°)
Sun at mid-height
Winter (Dec-Feb)
Shallow angle (30-40°)
Sun stays low
⚡ Expected Power Output
Common Positioning Mistakes to Avoid
⚠️ Common Mistake: Don't set up panels flat on the ground pointing straight up. Even if the sun is directly overhead at noon, a tilted panel almost always captures more light than a flat one. The kickstands exist for a reason.
Avoid positioning panels where they'll be shaded later in the day. That spot that's sunny at 9am might be shaded by 11am as the sun moves. Think ahead about the sun's path.
Don't place panels behind windows or tent walls. Glass and fabric block UV light and can cut your charging speed by 40-70%. Solar panels need direct outdoor sunlight.
Step 2: Connect Your Solar Panel to the Explorer 500
Now that your panel is positioned, let's make the physical connections. This part is straightforward, but there's a specific order that protects your equipment.

Locate the 8mm solar input port

MC4 connectors from solar panel
Locate the Solar Input Port
On your Explorer 500, find the input ports on the side of the unit. You'll see two input options: an AC input port (for wall charging) and an 8mm barrel plug port labeled for solar and car charging. The solar input port is the one with the DC symbol and usually has an orange dot or “DC” label near it.
Make sure your Explorer 500 is powered off before proceeding. Press and hold the main power button until the LCD screen goes dark. This is important—we don't want any power flowing when we make the connection.
Connect the MC4 Adapter Cable
Your SolarSaga panel has a cable coming out of the junction box on the back. At the end of this cable, you'll see two MC4 connectors—one red (positive) and one black (negative). These connectors have a specific push-and-twist lock mechanism.
Take your MC4 to 8mm adapter cable. One end has MC4 female connectors that match the panel's male MC4 plugs. Connect red to red and black to black. Push the connectors together firmly and you'll feel them click. Then twist the outer collar to lock them in place. You should not be able to pull these apart without twisting the collar back.
The other end of your adapter cable has an 8mm barrel plug. This is what connects to your Explorer 500.
Plug Into the Explorer 500
Take the 8mm barrel plug from your adapter cable and insert it into the solar input port on your Explorer 500. Push it in firmly until you feel it seat completely. The fit should be snug but not requiring excessive force.
You'll know it's properly connected when the plug is fully inserted and sitting flush against the power station body. If it's sticking out or loose, remove it and try again.
At this point, everything is connected but nothing is powered on yet. Double-check all your connections are secure before moving to the next step.
🔌 Connection Sequence Flowchart
Press and hold power button until LCD goes dark
Red to red, black to black – Push & twist to lock
Push firmly into Explorer 500 solar input port
All connections secure – proceed to Step 3
Multiple Panel Setup (Optional)
If you're using two SolarSaga 100W panels, you'll need to connect them in parallel using a solar panel parallel adapter cable. This adapter combines the output of both panels into a single 8mm barrel plug.
Connect each panel's MC4 output to one of the parallel adapter's MC4 inputs, then plug the adapter's single 8mm barrel into your Explorer 500. The Explorer 500 can handle up to 100W of input, and the built-in MPPT controller will optimize whatever solar power is available from your two panels.
With two panels in good sun, you might see 85-95W total input on the LCD screen. You won't get a full 200W because the Explorer 500's input limit is 100W, but the extra panel surface area helps maintain higher input even when sun conditions aren't perfect.
Step 3: Power On and Verify Solar Charging
This is the moment of truth where we confirm everything is working correctly.

Start the System
Press and hold the power button on your Explorer 500 for about two seconds. The LCD screen will light up and show the current battery percentage, input watts, and output watts.
Look at the input section of the LCD screen. Within a few seconds, you should see a number appear showing the incoming solar power. This might start low and climb as the MPPT controller optimizes the charge, so give it 30-60 seconds to stabilize.
Check the Input Readings
In good sunlight with one SolarSaga 100W panel properly positioned, you should see 75-95W of input. Don't expect exactly 100W—that's a laboratory rating. Real-world conditions with atmospheric interference, panel temperature, and slight angle variations typically result in 75-90% of rated output.
If you're seeing 50-75W, your positioning is probably suboptimal. Go back and adjust your panel angle—even small changes can boost input by 20-30W. Rotate the panel slightly and watch the input watts on the LCD screen respond in real time.
Seeing 30-50W? You likely have partial shade or the panel is facing significantly away from the sun. Reposition completely and try a different spot.
Below 30W or zero input? We'll troubleshoot this in detail later, but first check that all connections are secure and your MC4 connectors are properly locked.
Understand the Display
The Explorer 500's LCD screen shows several key pieces of information. The input watts (usually with a solar icon) tell you how much power is flowing in from your panels. The battery percentage shows your current charge level. The estimated time to full charge appears when solar charging is active.
You might notice the input watts fluctuate slightly—this is normal. Clouds passing overhead, minor movements of the sun, or even temperature changes in the panel can cause 5-15W variations. As long as you're in the expected range, everything is working correctly.
What Good Charging Looks Like
You'll know you've got everything set up correctly when you see consistent input watts in the expected range (75-95W for one panel), the battery percentage is slowly climbing, and the time-to-full estimate seems reasonable.
For the Explorer 500's 518Wh capacity, expect these charge times from empty with one SolarSaga 100W panel in good sun:
- 0-50%: About 3.5-4 hours
- 50-80%: About 2-3 hours
- 80-100%: About 1.5-2 hours
Total charge time from empty to full: 7-9 hours of good sunlight with one panel. Want to know exactly how long it'll take in your conditions? Use our Jackery solar charge time calculator for precise estimates.
With two panels, cut those times roughly in half.
Step 4: Monitor Performance and Adjust as Needed
Your system is up and running, but we're not done yet. Solar charging requires periodic attention to maintain optimal performance throughout the day.

Track Your Charging Progress
Check your Explorer 500's LCD screen every 30-60 minutes to monitor progress. The input watts will vary as the sun's position changes, but you want to keep those numbers as high as possible.
If you notice input watts dropping significantly (like from 85W down to 50W), something has changed. Maybe a cloud passed over, or shade from a nearby object has crept across your panel. Time to investigate and adjust.
The battery percentage should climb steadily. On the Explorer 500, you'll see the percentage tick up roughly 1-2% every 5-10 minutes under good charging conditions. If progress stalls, check your connections and panel position.
Adjust Panel Angles Throughout the Day
Here's something many first-time users don't realize: the sun moves across the sky. That perfect angle you set up at 10am might be significantly off by 2pm.
For maximum efficiency, adjust your panel angle every 2-3 hours. You don't need to be precise—just walk over, eyeball where the sun is now compared to where it was, and tilt your panel to face the current sun position. Even a rough adjustment can boost your input by 20-30W.
Some users set phone reminders to check and adjust their panels. If you're at camp, make it part of your lunch routine or afternoon break. Two minutes of adjustment can add an extra 50-100Wh to your daily solar harvest.
Temperature Considerations
Solar panels actually work more efficiently when they're cooler. If your panels are getting hot to the touch in intense afternoon sun, that's normal, but it does reduce efficiency slightly.
The Explorer 500 has built-in temperature management. If the internal battery gets too hot, the system will slow down or pause charging to protect the battery. You'll know this is happening if you see input watts drop to zero even though sun conditions are good and your connections are solid.
If temperature throttling occurs, move your Explorer 500 to a shaded area—under a table, inside your vehicle, or in your tent. Keep the solar panels in full sun and use an extension cable to connect them to the now-shaded power station. This is where that optional DC extension cable really pays off.
Pass-Through Charging
Here's a feature that surprises people: can you use Jackery while solar charging? Yes! You can use your Explorer 500 to power devices while it's charging from solar. This is called pass-through charging, and the Explorer 500 handles it without issues.
The LCD screen will show both input watts (solar coming in) and output watts (power going to your devices). Your net charging speed is the difference between these numbers. If you're pulling in 85W from solar and using 35W to charge a laptop, your battery is gaining 50W—still charging, just slower.
For best results, try to keep your power consumption below your solar input. If you're using more power than the panels provide, you'll still draw from the battery and gradually discharge despite the sun shining.
Step 5: Optimize Your Solar Setup for Maximum Efficiency
Now that your system is working, let's talk about maximizing your solar charging performance. These tips can increase your daily solar harvest by 30-50%.
Panel Positioning Advanced Tips
The sun's path varies by season and location. In summer, the sun rises northeast and sets northwest with a high arc across the sky. In winter, it rises southeast, sets southwest, and stays much lower.
During summer months, tilt your panels at a steeper angle (more vertical). Winter months need a shallower angle (closer to horizontal) to catch the lower sun. A good starting point is your latitude in degrees—so if you're at 40° north latitude, set your panel at roughly 40° from horizontal.
For maximum daily harvest, position panels facing southeast in the morning, south at midday, and southwest in the afternoon. If you can only set them once, face them due south (in the Northern Hemisphere) as that captures the most total daily sunlight.
Keep Panels Clean
Dust, pollen, bird droppings, and morning dew can reduce solar output by 20-40%. Before you set up each day, wipe down your panels with a microfiber cloth or rinse them with clean water.
Don't use abrasive cleaners or rough cloths—these can scratch the panel surface over time. Plain water and a soft cloth is all you need. If you've got stubborn dirt, a tiny drop of mild soap diluted in water works fine.
Avoid Common Efficiency Killers
⚠️ Common Mistake: Partial shade is your enemy. Even if just 10% of your panel is shaded, you can lose 40-50% of output. Solar cells are connected in series, and one shaded cell can drag down the whole panel's performance. Always choose full sun over partial shade, even if the partial shade looks “pretty bright.”
Hot surfaces underneath your panels reduce efficiency. Don't set panels on dark car hoods, asphalt, or black surfaces that absorb heat. Grass, dirt, or light-colored surfaces are better. The cooler you keep your panel backs, the better they perform.
Cable kinks and damaged connectors create resistance that wastes power as heat. Keep cables straight, avoid sharp bends, and inspect connectors regularly for corrosion or damage.
Using Extension Cables Effectively
The DC extension cable is your friend for flexible positioning. You can place your solar panels 16 feet away from your power station, which lets you:
- Keep the Explorer 500 inside your vehicle or tent while panels catch sun outside
- Position panels on a roof or elevated surface while the power station stays at ground level
- Avoid running over cables with vehicles or foot traffic
- Protect the power station from rain while panels get soaked
Extension cables cause minimal power loss—usually less than 5% over 16 feet. The flexibility they provide far outweighs this small efficiency hit.
Advanced Monitoring
If you want to get serious about solar efficiency, track your daily solar harvest. Note the total watt-hours captured, the weather conditions, your panel positions, and the time of year. After a few sessions, you'll develop intuition for your system's capabilities and can plan power usage accordingly.
The Explorer 500 doesn't log data internally, but you can manually record the battery percentage at the start and end of your charging session. The difference (times 5.18) gives you the watt-hours gained. For example, if you charge from 20% to 75%, that's 55% × 5.18 = 285Wh captured.
⚡ Daily Solar Harvest Optimization Guide
Morning (7-10am)
Set up early, face southeast, capture 150-200Wh in rising sun
Midday (10am-2pm)
Peak hours! Face south, adjust angle, capture 300-350Wh
Afternoon (2-6pm)
Face southwest, capture final 150-200Wh before sunset
📊 Total Daily Harvest (One SolarSaga 100W)
400-500Wh/day
In optimal conditions with 3 adjustments
Verification & Testing: Confirming Everything Works
Before you rely on your solar system for an important trip or power outage, let's verify everything is functioning correctly.
Expected Performance Metrics
Under good conditions, here's what normal performance looks like:
| Condition | Expected Input (1 Panel) | What It Means |
|---|---|---|
| Perfect conditions | 85-95W | Clear sky, optimal angle, cool temps |
| Good conditions | 70-85W | Clear sky, decent angle |
| Fair conditions | 50-70W | Thin clouds, acceptable angle |
| Poor conditions | 20-50W | Heavy clouds or bad angle |
Charge Time from Empty:
- One panel, good sun: 7-9 hours to full
- Two panels, good sun: 6-7 hours to full (limited by 100W input cap)
- One panel, fair conditions: 10-14 hours to full
Temperature Range:
- Optimal panel operating temp: 60-75°F (15-24°C)
- Acceptable range: 32-100°F (0-38°C)
- Hot day (90°F+): Expect 10-15% efficiency loss
Quick Performance Test
Want to verify your setup is working optimally? Do this simple test on a clear, sunny day:
- Set up your panel at optimal angle around noon
- Note the input watts on the LCD after it stabilizes (60 seconds)
- Rotate the panel 45° to either side
- Watch the input watts drop by 30-50%
- Return to optimal angle and watch watts climb back up
If this test shows responsive changes matching your panel positioning, your system is working correctly. If watts don't change when you rotate the panel, check your connections.
Testing Under Load
To verify pass-through charging works correctly, plug in a device while solar charging is active. Try something with moderate draw like a laptop charger (40-65W).
Watch the LCD screen. You should see:
- Input watts (solar): Still around 75-95W
- Output watts: Roughly matching your device's consumption
- Battery percentage: Still slowly climbing (if input exceeds output)
The Explorer 500 should handle this without issues. If the unit shuts off or displays error codes during pass-through charging, consult the user manual's troubleshooting section.
Troubleshooting Common Issues
Even with careful setup, you might encounter issues. Here's how to diagnose and fix the five most common problems.
Issue #1: Zero Solar Input Showing on LCD
Symptoms: LCD screen shows Jackery solar panel not charging – 0W input despite panels being in full sun and properly connected.
Most Likely Cause: Loose connection somewhere in your cable chain.
Solution:
- Power off the Explorer 500 completely
- Unplug the 8mm barrel connector from the power station
- Disconnect the MC4 connectors between panel and adapter cable
- Inspect all connectors for damage, corrosion, or debris
- Reconnect everything firmly—you should hear/feel clicks
- Power on and wait 60 seconds for MPPT controller to initialize
If still showing zero input, try plugging the 8mm barrel into the other input port (the AC/DC input accepts the same connector on some models). If input appears now, the original port might have an internal issue requiring warranty service.
Issue #2: Low Input Watts (Below 50W in Good Sun)
Symptoms: Getting 20-50W when you should see 75-95W based on conditions.
Most Likely Cause: Panel angle is significantly off from optimal.
Solution:
- Check panel is facing generally toward the sun (not 90° or 180° off)
- Adjust angle using kickstands—try both available positions
- Watch LCD screen input watts respond in real time as you adjust
- Confirm no shade is hitting any part of the panel surface
- Verify panel surface is clean (wipe with microfiber cloth)
If you're still getting low input after optimizing angle and cleaning, check if it's a particularly hot day. Panels can lose 10-20% efficiency when surface temperature exceeds 150°F. Try angling panels to catch breeze or wait for cooler hours.
Issue #3: Charging Stops or Fluctuates Wildly
Symptoms: Input watts jump from 80W to 0W and back repeatedly, or charging stops mid-session.
Most Likely Cause: Intermittent connection due to loose cable or thermal shutdown.
Solution:
First, check for loose connections using the same process as Issue #1.
If connections are solid, this might be thermal management. Touch the Explorer 500 body—if it's hot to the touch, the internal battery is overheating. Move the unit to shade and let it cool for 20-30 minutes. Charging will resume automatically when temperature drops to safe levels.
If neither loose connections nor thermal issues are the cause, you might have a failing cable. The MC4 to 8mm adapter cable is the most common failure point. Try borrowing a friend's cable or ordering a replacement to test.
Issue #4: Can't Charge While Using Devices
Symptoms: Solar charging stops when you plug in devices to use power.
Most Likely Cause: This is actually normal when your power consumption exceeds solar input.
Solution:
The Explorer 500 prioritizes device output over battery charging. If you're pulling 100W to run a blender while only getting 85W from solar, the system draws the 15W deficit from the battery.
To charge while using devices:
- Reduce power consumption below solar input (unplug high-draw devices)
- Wait for peak sun hours when solar input is highest
- Use devices that draw less than 50W so you've got 30-40W going to battery
This isn't a malfunction—it's how the system manages power flow. You can use devices while solar charging, but battery level will only climb if solar input exceeds total output.
Issue #5: Charge Time Much Longer Than Expected
Symptoms: Taking 12-15 hours to charge when you expected 7-9 hours.
Most Likely Cause: Combination of suboptimal angle, weather conditions, and not adjusting panels throughout the day.
Solution:
Solar charge time is highly variable based on conditions. Getting the shortest charge times requires:
- Setting up by 9am to capture morning sun
- Adjusting panel angle every 2-3 hours as sun moves
- Choosing days with clear skies (thin clouds cut input by 30-50%)
- Maintaining clean panel surfaces
- Positioning panels in locations with zero shade all day
Even with perfect setup, charge time varies by season. Winter days have fewer sunlight hours and lower sun angles, so a charge that takes 7 hours in June might need 10-12 hours in December.
If you consistently get longer charge times than expected even in good conditions, consider testing with a different location or checking if nearby buildings or trees cast shade during parts of the day you didn't notice.
🔧 Need More Power? Consider Upgrading
If you're consistently running out of capacity or frustrated by charge times, the Jackery Explorer 1000 v2 offers 1,002Wh capacity, LiFePO4 battery (4000 cycles), and faster charging. Perfect for frequent users or off-grid adventures.
$799 | Double the capacity | 10-year lifespan | Faster solar charging
Pro Tips: Maximizing Your Solar Charging Experience
After testing dozens of Jackery systems, here are the strategies that make the biggest difference in real-world solar charging.
💡 Pro Tip #1: Set Up Early, Charge All Day
Most people set up solar panels at noon thinking “the sun is highest now, this is best.” Actually, starting early—by 8 or 9am—captures more total energy over the day even though morning sun is less intense. Those extra 3-4 hours of moderate solar input (60-75W) add 180-300Wh to your daily harvest. That's the difference between fully charging your Explorer 500 or ending the day at 70%.
💡 Pro Tip #2: The Two-Panel Sweet Spot
While the Explorer 500 limits input to 100W, having two panels maintains higher, more consistent charging even when conditions aren't perfect. With one panel, a cloud passing overhead drops you from 85W to 30W. With two panels, that same cloud only drops you from 95W to 60W—the system stays above 50W far more consistently. Two panels also mean less critical angle optimization. With more panel surface area, you can be “close enough” on positioning and still maintain good charging speeds.
💡 Pro Tip #3: Create a Solar Window
If you're at a fixed campsite for multiple days, establish a “solar window”—a zone that stays sunny from 9am-4pm with zero shade. Map out where shadows from trees, buildings, and vehicles fall throughout the day. Mark this spot and always deploy your panels there. Having a proven location eliminates the daily guesswork of “where should I set up today?”
💡 Pro Tip #4: Afternoon Optimization Matters Most
Counter-intuitive fact: the hours from 1pm-4pm provide the most efficient charging on most days. Morning sun is weaker, and late afternoon sun is lower angle. But that 1-4pm window delivers peak watts consistently. If you can only adjust your panels once during the day, do it around 1pm. Optimize angle and position during this premium charging window to capture maximum power.
💡 Pro Tip #5: Cold Weather is Your Friend
Solar panels love cold weather. A cold, crisp, sunny winter day can deliver better solar charging than a hot summer day, even though there are fewer daylight hours. At 30°F, your panels can produce 10-15% more power than the same panels in 90°F heat. If you're winter camping or using your system in cold conditions, your panels will surprise you with their performance—just make sure the Explorer 500 itself stays warm enough to charge (it works down to 32°F).
💡 Pro Tip #6: Document Your Best Setups
Take photos of your best solar setups including panel angles, positions, and shadows. Note the date, time, and weather conditions. Over time, you'll build a personal reference library of “what works” for different seasons and locations. These photos are especially valuable if you return to the same camping spots. You'll remember exactly where to position panels and what angle worked best, shaving 10-15 minutes off setup time.
Frequently Asked Questions
Can I use the Explorer 500 while it's solar charging?
Yes, the Explorer 500 supports pass-through charging. You can run devices from the AC outlets, USB ports, or car port while solar panels are connected and charging the internal battery. The LCD screen shows both input watts (solar) and output watts (your devices).
The battery charge speed depends on the difference between these numbers. If you're getting 85W from solar and using 35W for a laptop, your battery gains 50W and continues charging—just slower than if no devices were connected.
How long does it take to fully charge the Explorer 500 with solar?
With one SolarSaga 100W panel in good conditions, expect 7-9 hours to charge from empty to full. This assumes clear skies, optimal panel positioning, and adjusting the angle 2-3 times throughout the day.
With two SolarSaga 100W panels, charge time drops to 6-7 hours due to the Explorer 500's 100W input limit. The second panel helps maintain higher input in suboptimal conditions but won't double your charging speed in perfect conditions.
Weather dramatically affects charge times. Cloudy days or winter sun can extend charging to 12-16 hours or make full charging impossible in a single day.
Do I need to use Jackery solar panels, or can I use third-party panels?
The Explorer 500 works with any solar panel that meets these specifications:
- 12-30V voltage output (18V is ideal)
- Maximum 100W power (at the panel's rated max)
- 8mm barrel connector or MC4 connectors with an adapter
Many third-party panels work great. Popular compatible brands include Renogy, ALLPOWERS, and Rockpals. The key is matching the connector type and staying within voltage limits.
That said, Jackery's SolarSaga panels are optimized for their power stations with connector compatibility guaranteed and matched MPPT charging profiles. Third-party panels work but may charge 10-15% slower due to voltage curve differences. For compatible options, check out our guide on third-party solar panels for Jackery.
What's the minimum sunlight I need for solar charging to work?
The Explorer 500 will initiate charging with as little as 20-30W of solar input. On a heavily overcast day with diffused light, you might see 15-35W depending on cloud thickness.
However, practical solar charging really requires at least 50W of input to meaningfully replenish the battery. Below that, you're gaining power so slowly that normal vampire drain and system overhead eat up most of the benefit.
For planning purposes, assume you need at least partly sunny conditions for worthwhile solar charging. Completely overcast days or heavy shade won't provide enough input to be useful.
Can I leave solar panels connected overnight or when not charging?
Yes, you can leave panels connected safely. When there's no sunlight, the panels produce zero voltage and the Explorer 500 simply detects no input. There's no reverse drain or phantom draw—the battery won't discharge back into the panels.
Many users leave everything connected overnight and let charging resume automatically at sunrise. The MPPT controller detects incoming solar power and begins charging without any action needed.
That said, if you're packing up or bad weather is coming, disconnect and store your panels properly. The MC4 connectors are weather-resistant when locked together, but prolonged exposure to rain or moisture can cause corrosion over time.
Why isn't my solar input reaching the rated 100W?
Several factors prevent real-world solar input from matching laboratory ratings:
Panel temperature: Hot panels lose 10-20% efficiency. A panel rated for 100W at 77°F might only deliver 80-85W at 110°F surface temperature.
Atmospheric conditions: Humidity, dust, and air pollution scatter sunlight. Even “clear” days have atmospheric losses of 5-10% compared to laboratory conditions.
Angle imperfection: Unless you're adjusting your panel every 15 minutes to track the sun precisely, your angle is always slightly suboptimal, costing 5-15W.
Cable resistance: Every connection and cable length introduces small resistive losses—typically 3-5W total.
In practice, seeing 75-90W from a 100W panel in good conditions means your system is working perfectly. Only in ideal conditions—cold, crystal-clear air, perfect angle, brand new equipment—might you see 95-100W briefly.
Can I charge the Explorer 500 from solar and AC wall outlet simultaneously?
No, the Explorer 500 doesn't support dual input charging. You can use either solar or AC wall charging, but not both simultaneously.
If you plug in AC power while solar is connected, the system automatically prioritizes AC input and ignores solar. This is intentional design—dual input charging would require more complex battery management that could shorten battery lifespan.
For fastest charging, use the AC wall adapter (provides 100W input, same as maximum solar input). For off-grid or outdoor charging, use solar panels. Pick one input method at a time.
What if my solar panel cable isn't long enough to reach the power station?
This is where the DC extension cable becomes essential. Jackery's 16.4-foot extension cable adds length between your panel and power station, letting you position them separately.
Common scenarios where you need an extension:
- Panels on your RV roof while power station stays inside
- Panels catching sun in an open field while you stay shaded under a tree
- Panels outside your tent while you charge devices inside
The extension cable causes minimal power loss (less than 5% over 16 feet). For even longer runs, you can daisy-chain two extension cables, though power loss increases to 8-10% with extended cable runs beyond 30 feet.
Conclusion: You're Ready for Solar Freedom
You've done it. Your Jackery 500 solar generator system is set up, tested, and ready to provide free, clean power wherever you go.
Let's recap what we covered: you positioned your panels for maximum sun exposure, connected all cables securely with the proper Jackery solar panel connector MC4 to 8mm adapter, powered on the system and verified charging, monitored performance throughout the day, and learned how to troubleshoot the most common issues.
You now know how to optimize panel angles as the sun moves, when to adjust positioning for best results, and how to verify your system is performing correctly based on LCD screen readings. You've learned that solar charging takes patience—it's slower than wall charging but gives you complete energy independence.
Next Steps
Take your system out for a test run this weekend. Set up in your backyard or at a local park and run through the full process. Time how long setup takes you (it'll be faster each time). Try powering different devices while solar charging to get a feel for the pass-through charging capability.
Document what works. Take photos of good panel positions. Note your input watts in different conditions. This firsthand experience builds confidence for when you really need your solar system during a camping trip or power outage. For more camping-specific tips, check out our camping power setup guide.
When to Consider Upgrading
The Explorer 500 is an excellent starter solar system, but you might eventually outgrow it. If you find yourself:
- Running out of capacity regularly (518Wh isn't enough)
- Frustrated by the 7-9 hour solar charge time
- Wanting to power larger appliances (500W limit feels restrictive)
- Needing faster AC wall charging (7 hours is too long)
Then it might be time to explore the Jackery Explorer 1000 v2 or larger systems. These bigger units offer more capacity, faster charging, and higher continuous output—but they also cost more and weigh significantly more. The Explorer 500 hits a sweet spot for weekend use and emergency backup.
The Solar Advantage
Every hour you spend solar charging is an hour of free, silent, emission-free power. No generator noise. No gas station runs. No extension cords to the nearest outlet. Just you, your equipment, and the sun.
That's a level of independence that changes how you think about camping, van life, and emergency preparedness. You're no longer limited by how much battery charge you started with—as long as the sun comes up, you can generate power.
Welcome to solar freedom. You've got this.
⚡ Ready to Get Started?
Best Value: Get the complete Solar Generator 500 Bundle and save $99 compared to buying separately. Everything you need to start harvesting solar power today.
Get Solar Generator 500 Bundle →
$799 | Free shipping | Explorer 500 + SolarSaga 100W + All cables
Save $99 vs buying separately | 2-year warranty included
Related Reads
Originally published: December 10, 2025