
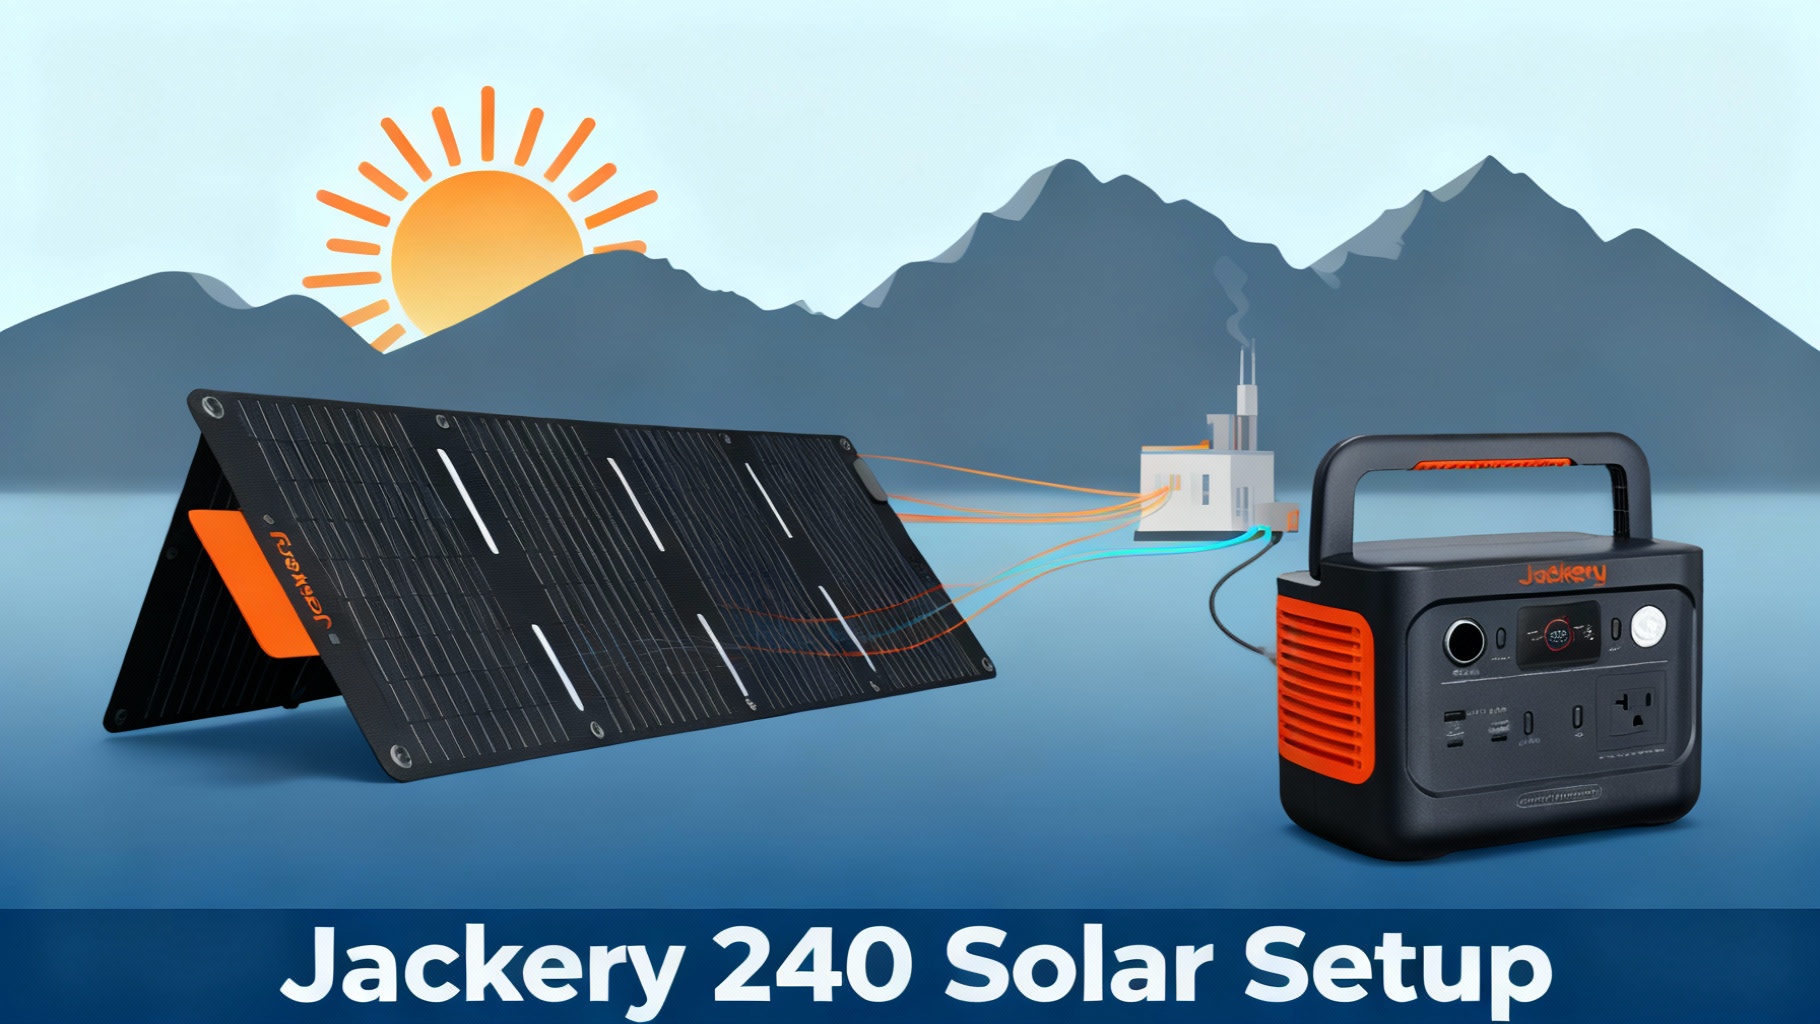
 Explorer 240 solar setup with SolarSaga panel at campsite” />
Picture this: you're at your campsite, evening is setting in, and your Jackery Explorer 240 sits at 30% battery. No electrical hookup in sight. You've got the solar panels in your trunk, but staring at the cables and connectors feels… confusing. Which cable goes where? What if you connect something wrong and damage your power station?
Don't worry—setting up solar charging for your Explorer 240 is actually straightforward once you understand the basics. No electrical engineering degree required. If you can plug in a phone charger, you can do this.
In this guide, I'll walk you through the complete solar setup process in about 30 minutes. You'll learn exactly which equipment you need, how to connect everything correctly, and how to troubleshoot common issues. By the end, you'll have unlimited free power whenever the sun is shining.
⚡ Quick Setup Flowchart
Step 1
Gather Equipment
5 min
Step 2
Position Panel
5 min
Step 3
Connect Cables
10 min
Step 4
Verify Charging
5 min
Total Time: 25-35 minutes • Difficulty: ★☆☆☆☆
What You'll Need (Materials & Tools)
Before we dive into the setup steps, let's make sure you have everything required. Missing even one small adapter can stop your setup in its tracks.
Required Equipment
Here's exactly what you need to get started:
1. Jackery Explorer 240D (or Original Model)
The heart of your solar setup. The newer 240D model offers 256Wh capacity with a 200W pure sine wave inverter, while the original provides 240Wh. Both work perfectly with solar panels—the connection process is identical.
The 240D model costs $209 depending on sales. It weighs just 6.4 pounds, making it the most portable option in Jackery's lineup. Key specs you need to know: maximum solar input is 65W (240D) or 50W (original). This matters because it determines which solar panels you can use efficiently.
2. Solar Panels (Choose One Option)
You have two main choices here, each with different charging speeds:
Option A: SolarSaga 100W (Recommended for most users)

This panel charges your Explorer 240 in about 4-5 hours under ideal conditions. At $299, it's pricier but offers the fastest charging speeds the 240 can handle. The 100W panel folds down to briefcase size and includes all necessary cables.
Keep in mind that even though it's rated at 100W, the Explorer 240D can only accept up to 65W of solar input. The panel will automatically throttle down to match what your power station can handle. Think of it like a water hose—the panel can deliver 100W, but your power station's input is the limiting factor.
Option B: SolarSaga 40W (Budget-Friendly)

If you're not in a rush for charging, the 40W panel works great at just $79. Charging takes about 10-11 hours in good sunlight, which is perfect for multi-day camping trips where your panel can sit out all day. This panel actually comes bundled with the Solar Generator 240D package for $309 total.
The 40W panel is lighter and more compact, but you're trading speed for portability and cost savings.
3. Solar Cables & Adapters
Here's where newcomers often get confused. Your solar panel connects to your power station using specific cables and adapters. The good news: most of what you need comes in the box.
The SolarSaga panels include an MC4 to 8mm adapter cable. This cable has two ends: MC4 connectors (industry-standard solar panel connectors that lock together) on one end, and an 8mm barrel plug on the other end that fits into your Explorer 240.
If you have the v2 model, you might also need a DC8020 to USB-C adapter for certain charging scenarios, though this isn't required for basic solar setup. Check your power station's box before buying extras.
4. Extension Cable (Optional but Helpful)
An extension cable (10-15 feet recommended) gives you flexibility in where you place your panels versus your power station. For example, you can mount panels on your RV roof while keeping the 240 inside where it's protected.
Make sure any extension cable you buy is MC4-compatible. These run $20-30 and are worth it if you want to optimize panel placement for maximum sun exposure.
Optional But Helpful Items
These aren't required, but they make the setup process smoother:
- A multimeter ($15) helps verify voltage if you're troubleshooting connection issues. Useful but not necessary for basic setup.
- Velcro cable ties ($10) keep your cables organized and prevent tripping hazards. When your panels are deployed, loose cables can be a safety issue.
- A weatherproof panel cover ($25) protects your SolarSaga if you're leaving it deployed for multiple days. The panels are weather-resistant but not weatherproof.
- A small tarp ($15) shades your Explorer 240 during charging. The power station shouldn't sit in direct sunlight—it gets hot and reduces charging efficiency.
Estimated Time & Difficulty
Let's set realistic expectations:
Setup time:
- First time: 25-35 minutes
- Subsequent setups: 10-15 minutes
Difficulty: ★☆☆☆☆ (Beginner – Easiest level)
The first setup takes longer because you're figuring out cable routing and optimal panel placement. After that, it's quick and routine.
Physical effort: Minimal. The heaviest item is the Explorer 240 at 6.4 pounds (v2) or 6.6 pounds (original). Even the SolarSaga 100W panel weighs just 9.1 pounds.
Best conditions: Sunny day between 11am-2pm (peak sun hours). You can set up in any conditions, but you won't see good charging performance on cloudy days.
💡 Want the Complete Solar Generator 240D Bundle?
Jackery Solar Generator 240D (Explorer 240D + SolarSaga 40W) – Everything you need in one package.
- Save setup hassle – Cable included, perfectly matched
- LiFePO4 battery – 3,000 cycles (10-year lifespan)
- 1-hour fast charging via app activation
$309 | Free shipping | 3-year warranty + 2-year extended
Before You Start: Safety & Preparation
Solar power is safe, but let's cover a few important precautions before you start connecting cables.
Safety First
⚠️ Never connect solar panels while the Explorer 240 is powered on. Turn off the power station before plugging or unplugging anything. The sudden voltage surge from connecting hot panels can damage sensitive electronics.
⚠️ Keep the Explorer 240 out of direct sunlight during charging. The power station has ventilation, but sitting in 90°F direct sun reduces charging efficiency and can overheat the battery management system. Place it in shade—under a camp table works perfectly.
⚠️ Don't connect multiple solar panels in series to the Explorer 240. You might think two 100W panels would charge faster, but the 240 is designed for a single panel input. Exceeding the 65W max input could damage the charge controller. If you need faster solar charging, you need a bigger power station like the Explorer 1000.
⚠️ Inspect cables before each use. Look for frayed wires, damaged connectors, or exposed metal. Solar panels generate voltage as soon as sunlight hits them, so a damaged cable is a safety hazard.
Preparation Checklist
Before starting the setup process, verify these items:
- Location scouted: Find a spot with unobstructed sun exposure for your panels. No shade from trees, vehicles, or tents. The sun's path matters—position panels where they'll stay sunny for several hours.
- Cables untangled: Spread out all cables and adapters. Identify each connector type. The MC4 connectors are the ones that snap together and lock. The 8mm barrel plug is smooth and round.
- Power station at less than 80% charge: If your 240 is already at 100%, you won't see immediate charging, which can be confusing when testing your setup.
- Weather checked: You need at least partly sunny conditions. Overcast days produce minimal charging—maybe 10-20% of rated output. Not worth the setup effort unless you're staying multiple days.
Step 1: Position Your Solar Panel

Panel placement makes a huge difference in charging speed. Let's get this right from the start.
Find a location with direct, unobstructed sunlight. Your panel should face south (in the Northern Hemisphere) with no shade covering any part of the panel. Even partial shade—like a tree branch shadow across one corner—can reduce output by 50% or more due to how solar cells are wired internally.
Unfold your SolarSaga panel completely. The panel has a built-in kickstand that props it at a pre-set angle. For the SolarSaga 100W, this angle is approximately 30 degrees from horizontal.
Here's the critical part most beginners miss: the optimal panel angle changes throughout the day as the sun moves. The ideal angle equals your latitude (Fort-de-France is about 14.6°N, so optimal is around 15-20° angle). But the kickstand is fixed, so you're working with what you've got.
For better charging, you'll want to adjust the panel angle every 2-3 hours. Point the panel directly at the sun—imagine drawing a straight line from the sun to the center of your panel. That's your optimal angle.
Place the panel on stable ground. Don't lean it against your car tire or an uneven surface where it might fall over. Wind gusts can knock over poorly positioned panels.
✅ You'll know it's correct when: The panel is stable, facing south, and you can see its shadow directly underneath it (meaning the sun is perpendicular to the panel face).
⚠️ Common mistake: Laying the panel flat on the ground. This reduces output by 30-40%. Always use the kickstand or prop it at an angle.
☀️ Optimal Panel Angle Throughout the Day
8-10am
Face East-Southeast
Output: 30-40%
10am-12pm
Face South
Output: 70-85%
12-2pm
Face True South
Output: 90-100%
2-5pm
Face Southwest
Output: 50-70%
💡 Pro Tip: Adjust panel angle every 2-3 hours for 25-30% more daily power generation
Step 2: Connect the Solar Panel to Your Power Station
Now we're ready to make the electrical connections. This is where beginners worry about “doing it wrong,” but it's actually foolproof by design.
Locate the MC4 to 8mm adapter cable that came with your SolarSaga panel. It's usually orange or red, about 6 feet long. One end has two MC4 connectors (one male, one female), and the other end has a small barrel plug.
The MC4 connectors attach to the cable coming from your solar panel. Here's the key: MC4 connectors only fit together one way. The male connector (with the pin) goes into the female connector (with the socket). Push firmly until you hear and feel a click. That click is the locking mechanism engaging.
Don't worry about reversing polarity—it's physically impossible with MC4 connectors. Red connects to red, black connects to black, and the connector shapes prevent you from mixing them up.
Once your MC4 connectors are attached, you'll have a single cable with an 8mm barrel plug on the end. This plug goes directly into the DC input port on your Explorer 240. The DC input port is clearly labeled—it's the round socket that says “DC IN” next to it.
⚠️ Before plugging in: Make sure your Explorer 240 is powered OFF. Press and hold the power button until the display turns off completely.
Insert the 8mm barrel plug into the DC input port. Push firmly but don't force it. The plug should slide in smoothly and seat completely. You might feel a slight resistance at first, but it shouldn't require significant force.
✅ You'll know it's correct when: The plug is fully inserted (you can't see any metal connector showing), and it feels secure. A properly seated plug won't wiggle or pull out easily.
⚠️ Common mistake: Trying to plug the solar cable into the USB-C port. The barrel plug is specifically for the DC input—don't try to adapt it to other ports.
⚡ Need a Faster Charging Solution?
If 4-5 hour charge times feel too slow, upgrade to the SolarSaga 100W panel for maximum charging speed with your Explorer 240.
- 23% efficiency – Industry-leading solar conversion
- IP68 waterproof – Built for extreme conditions
- Bifacial design – Captures reflected sunlight
$299 | Free shipping | 3-year warranty + 2-year extended
Step 3: Power On and Monitor Charging
With everything connected, it's time to fire up your system and verify it's charging.
Press and hold the power button on your Explorer 240 for about 2 seconds. The LCD screen will light up and display current battery percentage.
Look at the input wattage display on the screen. Within 5-10 seconds, you should see a number appear showing incoming solar power. This number represents watts currently being generated by your solar panel.
With a SolarSaga 100W panel in good sun conditions, expect to see 40-65W showing on the display. With a SolarSaga 40W, expect 25-40W. These numbers are lower than the panel's rated output because:
- Real-world sun intensity varies throughout the day
- Panel angle isn't always perfectly optimized
- Temperature affects panel efficiency
- The Explorer 240 has a maximum input limitation
If you see the input wattage fluctuating—say, bouncing between 35W and 50W—that's normal. Clouds passing overhead, slight angle changes from wind, and even heat all cause minor fluctuations.
The screen will also show estimated time to full charge. This estimate updates constantly based on current input wattage. Don't worry if it changes—it's recalculating based on real-time conditions.
✅ You'll know it's working when: The battery percentage slowly increases, the input wattage shows a steady number above 20W, and you might hear a very quiet fan noise from the power station (this is the cooling system for the charge controller).
What if you see 0W input? Don't panic. We'll troubleshoot this in a moment. Common causes include a cable not fully seated, the panel not getting direct sun, or the battery already at 100%.
Step 4: Optimize Angle Throughout the Day
Your solar panel is now charging your Explorer 240, but we can do better. Optimization makes the difference between a 4-hour charge and an 8-hour charge.
Every 2-3 hours, check your panel's angle relative to the sun's position. The sun moves about 15 degrees per hour across the sky. This means a panel optimally positioned at noon will be significantly off-angle by 3pm.
To adjust, simply move the panel's kickstand or reposition the entire panel to face the current sun position. You're aiming for perpendicular alignment—imagine the sun's rays hitting your panel straight on, not at an angle.
Here's a simple test: hold your hand above the panel at arm's length. Your hand's shadow should be directly underneath your hand, not cast off to one side. If the shadow is offset, your panel isn't perpendicular to the sun.
For maximum efficiency, track the panel 3-4 times during a full charging day:
- Morning setup: Face east-southeast
- Late morning (10-11am): Adjust to more southward
- Midday (12-2pm): Face true south
- Afternoon (3-4pm): Adjust to face southwest
Each adjustment takes 30 seconds and can boost your charging rate by 20-30%.
Also monitor the input wattage on your Explorer 240's display. When you reposition the panel, watch for the wattage to increase. If it drops, you've moved the wrong direction—reposition until you see maximum wattage.
✅ You'll know optimization is working when: Your input wattage increases after each adjustment, and you maintain higher wattage (45W+) for longer periods instead of watching it slowly drop as the sun moves.
Step 5: Verify System Is Charging Correctly
Let's confirm everything is working as it should. This verification step catches issues before you walk away and assume everything's fine.
Check the LCD display on your Explorer 240. You should see three key indicators:
- Battery percentage increasing. Even if it's slow (1% every 10-15 minutes), it should be trending upward.
- Input wattage displayed. Any number above 15W means you're charging. Lower than 15W usually indicates poor sun conditions or angle issues.
- No error codes. If you see any error messages or warning symbols, consult the troubleshooting section below.
Do a physical inspection of all connections. Tug gently on the cables where they connect to verify they're secure. Check that the MC4 connectors are still locked together—they sometimes work loose if someone trips over the cable.
Look at your solar panel surface. Is it clean? Dust, pollen, or morning dew can reduce output by 10-20%. If your panel is dirty, wipe it down with a damp cloth.
Verify your Explorer 240 isn't in direct sunlight. Touch the side of the unit—it should feel warm at most, not hot to the touch. If it's hot, move it to a shaded area. Heat reduces lithium battery charging efficiency.
Finally, set a reminder to check back in 1 hour. After an hour of charging, your battery percentage should have increased by 5-10% (depending on panel size and conditions). If it hasn't, something's wrong—proceed to troubleshooting.
✅ You'll know everything is working correctly when: Battery percentage climbs steadily, input wattage remains consistent (allowing for minor fluctuations), no error messages appear, and the system is cool to touch.
Verification & Testing Results
After completing the setup, let's talk about what to expect in real-world charging scenarios.
Expected Charging Performance
Your charging speed depends on several variables: sun intensity, panel angle, temperature, and battery charge state. Here's what you can realistically expect:
The key takeaway: solar charging is highly dependent on conditions. Don't expect consistent charging speeds every day.
Testing Checklist
Use this checklist to verify your setup is working correctly:
- ✅ Input wattage displays on Explorer 240 screen
- ✅ Battery percentage increases over 30-minute period
- ✅ No error codes or warning messages displayed
- ✅ All cable connections secure and locked
- ✅ Panel positioned in direct sunlight with no shade
- ✅ Explorer 240 positioned in shade, not overheating
- ✅ Cables routed safely with no tripping hazards
If you can check all these boxes, your solar setup is complete and working correctly.
🎯 Ready to Go Fully Off-Grid?
If the Explorer 240's 256Wh capacity feels limiting, upgrade to the Explorer 1000 v2 for a big jump in capacity and output.
- 1,070Wh capacity – about 4× more power than the 240
- 1,500W AC output – runs far larger devices and faster charging
- LiFePO4 battery – long-life cells for years of use
Starting at $499 | Free shipping | 3-year warranty + 2-year extended
Troubleshooting Common Issues
Even with a straightforward setup, things sometimes go wrong. Here are the six most common problems and their solutions.
🔧 Quick Troubleshooting Guide
❌ 0W Input (Not Charging)
- Check DC input connection
- Verify MC4 connectors locked
- Move panel to full sun
- Check battery not at 100%
🐌 Slow Charging
- Optimize panel angle to sun
- Clean panel surface (dust/pollen)
- Move 240 to shade (overheating)
- Normal for 85-100% charge
⚡ Intermittent Charging
- Secure all cable connections
- Use velcro ties to prevent movement
- Wait for stable weather (clouds)
- Inspect MC4 connectors for damage
⚠️ Error Code Displayed
- Check panel specs (65W max)
- Move 240 to shade (overheating)
- Let unit cool 15 minutes
- Restart system
Problem 1: Display Shows 0W Input (Not Charging)
Possible Causes:
The most common issue is a connection problem. Start by checking the 8mm barrel plug in your Explorer 240's DC input port. Remove it completely and reinsert it, making sure it seats fully. You should feel it click into place.
Next, check your MC4 connectors where the panel cable meets the adapter cable. These connectors lock together, but they can work loose. Disconnect them and reconnect firmly until you hear the click.
Another possibility: your panel isn't getting direct sunlight. Even 50% shade can reduce output to nearly zero. Move the panel to full sun and wait 30 seconds for charging to start.
Finally, verify your Explorer 240's battery isn't already at 100%. A full battery won't accept charge, so the display will show 0W input.
Solution: Systematically check each connection point, ensure full sunlight on the panel, and verify battery level is below 95%.
Problem 2: Charging Speed Slower Than Expected
Possible Causes:
The sun's angle relative to your panel is the most frequent culprit. If your panel is pointing east but the sun is now in the south, you're losing 40-50% of potential power. Reposition the panel to face the sun directly.
Temperature plays a bigger role than most people realize. Solar panels lose efficiency in extreme heat. On a 95°F day, your 100W panel might only deliver 70-80W maximum. There's not much you can do except wait for cooler parts of the day.
Dirty panels reduce output by 10-20%. If you see dust, pollen, or water spots, wipe the panel clean with a damp microfiber cloth.
Your battery charge state affects charging speed too. The last 10-15% of charge (from 85% to 100%) always charges slower as the battery management system tapers the input to protect battery life.
Solution: Optimize panel angle, clean the panel surface, and understand that some slowdown is normal and expected.
Problem 3: Intermittent Charging (On and Off)
Possible Causes:
Loose cable connections cause intermittent charging. Every time the cable moves, contact is lost momentarily, causing charging to stop and restart. Check all connection points and ensure they're tight.
Clouds passing overhead create the same intermittent pattern. Watch the sky—if you see clouds moving through, that's likely your issue, not a hardware problem.
A failing MC4 connector can also cause intermittent charging. Inspect the connectors carefully. If you see corrosion, damaged pins, or worn locking mechanisms, the connector may need replacement.
Solution: Secure all cables with velcro ties to prevent movement, wait for stable weather conditions, or replace damaged connectors.
Problem 4: Slower Charging in Morning/Evening
Possible Causes:
This isn't actually a problem—it's expected behavior. The sun's angle in early morning and late evening means sunlight travels through more atmosphere before reaching your panel. This reduces intensity significantly.
Additionally, cooler morning temperatures combined with low-angle sun means panels need time to “warm up” to full efficiency.
Solution: Accept that morning/evening charging is naturally slower. Peak charging hours are always 10am-3pm. If you need a full charge, plan to have your panels deployed during these peak hours.
Problem 5: Error Code Displayed
Possible Causes:
Error codes typically indicate the power station detected a problem with incoming solar power. The most common code relates to overvoltage—you might have connected a panel that exceeds the Explorer 240's maximum input.
Overheating can also trigger error codes. If your power station is sitting in direct sun, it may shut down charging to protect the battery.
Solution: Check your panel's specifications against the Explorer 240's maximum input (65W for v2, 50W for original). Move the power station to shade and let it cool for 15 minutes. Restart the system and try again.
Problem 6: Panel Cable Won't Connect
Possible Causes:
You might be trying to connect incompatible connector types. The SolarSaga panels use MC4 connectors, but some third-party panels use different connectors like Anderson Powerpole or XT60. These won't connect without adapters.
Forcing connectors can also jam them. MC4 connectors require firm pressure but shouldn't need excessive force. If you're struggling to connect them, you might have male-to-male or female-to-female (which won't work).
Solution: Verify you have one male MC4 (with center pin) and one female MC4 (with socket). Align them and push straight together until you hear the click. If connectors are incompatible, purchase the correct adapter cable for your panel type.
Pro Tips for Maximum Solar Efficiency
Now that your basic setup is working, here are some advanced tips to squeeze more power from your solar panels.
💡 Pro Tip #1: Track the Sun Every 2 Hours
Set a phone reminder to adjust your panel angle every 2 hours during charging. Those 30-second adjustments can increase daily power generation by 25-30% compared to set-and-forget positioning.
💡 Pro Tip #2: Use an Extension Cable for Optimal Placement
Don't limit yourself to placing the panel right next to the power station. A 15-foot MC4 extension cable costs $25 and lets you position the panel in the sunniest spot while keeping your power station shaded and protected. Mount the panel on your RV roof while the power station sits safely inside.
💡 Pro Tip #3: Clean Panels Weekly
Desert camping means dust. Forest camping means pollen. Beach camping means salt spray. All of these reduce panel output. Pack a microfiber cloth and wipe panels clean once a week. Takes 2 minutes and maintains peak output.
💡 Pro Tip #4: Start Charging Early
Begin charging as early as 8am, even though output will be low initially. Those early hours add up. Starting at 8am versus 10am can mean the difference between 90% charged and 100% charged by evening.
💡 Pro Tip #5: Monitor Weather Patterns
Check weather forecasts and plan charging days around sunny conditions. If tomorrow calls for storms but today is clear, charge to 100% today. Battery self-discharge is minimal—your charge will last days or weeks.
💡 Pro Tip #6: Combine Solar + AC Charging
You can charge your Explorer 240 from both solar panels and wall power simultaneously for faster charging. The power station's charge controller handles both inputs safely. This is perfect when you're parked somewhere with electrical hookup but want to supplement with free solar power.
💡 Pro Tip #7: Avoid Charging Over 85% for Storage
If you're storing your Explorer 240 for more than a month, charge to 80-85% instead of 100%. Lithium batteries stored at full charge degrade faster over time. The sweet spot for long-term storage is 50-80%.
💡 Pro Tip #8: Invest in Panel Covers for Multi-Day Deployment
If you leave panels deployed for multiple days (like at a campsite), weatherproof covers protect them from morning dew, unexpected rain, and UV degradation. Your panels will last years longer with proper protection.
Explorer 240 vs 240 v2: Key Differences
Frequently Asked Questions
Can I leave my solar panels connected to the Explorer 240 overnight?
Yes, but it's not recommended. While the panels generate zero power at night (obviously), leaving them connected means your cables are exposed to dew, animals, and potential damage. It's better to disconnect and store your panels in their carrying case overnight.
What happens if clouds suddenly cover the sun while charging?
The Explorer 240 will automatically reduce its input acceptance to match the reduced panel output. Charging will slow down or stop temporarily. When the sun returns, charging resumes automatically. No harm is done to your power station or panels.
Can I charge the Explorer 240 while simultaneously powering devices?
Yes, this is called pass-through charging. The power station can accept solar input while delivering power to connected devices. However, your net charging speed will be slower. If your panel provides 50W and your device draws 30W, your battery only gains 20W.
How do I know when my Explorer 240 is fully charged?
The LCD display shows 100% when fully charged. The input wattage will drop to 0W as the charge controller stops accepting power. You might also notice the battery icon on the display is completely filled.
Is it safe to use my Explorer 240 during a thunderstorm?
Yes, the power station itself is safe to use indoors during a storm. However, disconnect your solar panels immediately. Lightning can strike solar panels (they're big metal rectangles outdoors), and while the Explorer 240 has some surge protection, it's not designed to handle a direct lightning strike through the solar input.
Why does my charging speed decrease as the battery nears 100%?
This is normal battery management behavior. The charge controller automatically reduces input power during the final 10-15% of charging to protect battery longevity. Fast charging to 100% repeatedly would degrade the battery faster over time.
Can I use non-Jackery solar panels with my Explorer 240?
Yes, as long as the panel's specs match the Explorer 240's requirements. Maximum input is 65W (v2) or 50W (original), voltage range is 12-30V, and you'll need an MC4 to 8mm adapter if your panel doesn't include one. Third-party panels can save money but may require additional adapters.
Should I remove the Explorer 240's protective rubber port covers during charging?
Only remove the cover from the DC input port where you're plugging in the solar cable. Leave all other port covers closed. These covers protect against dust and moisture—keep them closed when ports aren't in use.
How long will my SolarSaga panel last?
SolarSaga panels are rated for 10+ years of outdoor use with proper care. Expect 0.5-1% efficiency degradation per year, meaning after 10 years you'll still have 90-95% of original output. Clean monthly, store in the carrying case when not in use, and avoid unnecessary folding/unfolding to maximize lifespan.
Can I connect two 100W SolarSaga panels to charge faster?
No, do not do this. The Explorer 240's maximum solar input is 65W (v2) or 50W (original). Connecting two 100W panels in series could damage the charge controller. If you need faster solar charging, you'll want to upgrade to a larger power station like the Explorer 1000 or 1500 that support 200-400W solar input.
Conclusion: You're Ready for Off-Grid Power
You've now completed your solar setup and know how to maintain optimal charging performance. Your Explorer 240 can now provide unlimited power as long as the sun is shining.
The beauty of this system is that it gets easier every time. Your first setup took 25-35 minutes. Next time, you'll knock it out in 10-15 minutes without even thinking about it. The cable connections will become second nature, and you'll instinctively know the best angle for your panels.
As you gain experience, you'll develop a feel for reading weather conditions and predicting charging times. You'll learn your own power consumption patterns and know exactly when you need to deploy the panels.
A few next steps to consider:
- Download the Jackery app to monitor your Explorer 240's battery level, power consumption, and charging status remotely from your phone. The app provides more detailed information than the LCD display.
- Test your complete system before relying on it for critical power needs. Take it camping on a trial run where you have backup power available. Learn its capabilities and limitations in a low-risk setting.
- Consider upgrading if you find yourself needing more power. The Explorer 240 is excellent for light use—phones, tablets, laptops, small appliances. But if you're running larger devices regularly, the Explorer 1000 or 1500 might better serve your needs. Those models accept up to 200W of solar input, meaning much faster charging times.
Welcome to the world of portable solar power. You've just taken control of your energy independence.
🎉 Ready to Start Your Solar Journey?
Get the complete Jackery Solar Generator 240D Bundle and enjoy unlimited off-grid power in 30 minutes.
- ✓ Everything included – Power station + 40W panel + cables
- ✓ LiFePO4 battery – 10-year lifespan, 3,000 cycles
- ✓ 1-hour fast charging – Via app activation
- ✓ 3+2 year warranty – Industry-leading coverage
Free shipping | Instant solar setup | 30-day money-back guarantee
Related Reads
Originally published: December 10, 2025